Are you facing the Steam not opening or launching error on your Windows 10/11 computers? If yes, then this article will show you some techniques in order to fix this issue within minutes.
Epic Games and Microsoft have tried to carve out a place for themselves in the huge PC gaming market, but Steam is still the leader with up to 70% of the entire gaming market. However, like every other app, this might also show you errors like ‘can’t open Steam’.
There are many reasons why this issue can arise, such as Steam processes running in the background that isn’t closed or interference from other software. In this article, you will find the solution to this problem arising because of any reason. Many users have tried the solutions shared in the article to resolve the Steam not launching problem. There is no need to try them all out; just implement the solutions from top to bottom until you find the one that fixes the issue.
Ways To Get Rid Of Steam Not Opening On Windows 10/11
Here is a list of methods that will guide you through different processes to fix the Steam game not opening issue.
Solution 1: Close Steam Processes Running In The Background
Sometimes, your Steam client hasn’t completely shut down, and some of its tasks or processes are still running in the background. These background processes restrict you from opening the program and show you the Steam not opening issue.
This happens because your operating system will think that the same processes have already been running. To open your Steam client normally, you should first end all Steam tasks using the Task Manager. The steps below will help you close other steam processes in order to fix the Steam not launching issue.
- Press the Windows key + X key at the same time to open the Start menu’s context list. Select Task Manager from that list.

- On the Task Manager window, go to the Processes tab and look for the Steam running tasks.
- One by one click on every task and select the End Task option.
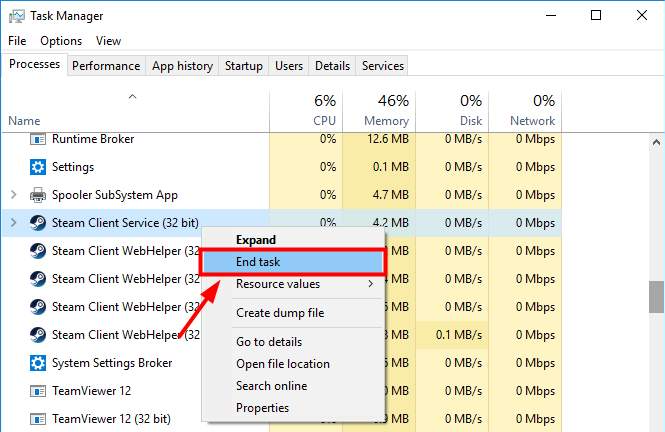
- A new pop-up window will appear every time you will end the task, asking for confirmation to close the process. Click on the OK button to confirm your actions.
After ending all the running Steam processes, launch the Steam client program and see if the Steam not opening issue is gone. If this solution does not work, jump on to the next one.
Also know: How to Fix SteelSeries Arctis 7 Mic Not Working [SOLVED]
Solution 2: Update Your Windows Operating System To Solve Steam Not Opening Problem
Make sure your Windows 10 operating system is up to date. Updating your Windows is another quick way to fix the Steam not launching problem. In some cases, the problem may be caused by a corrupted update, but a more recent update might fix the problem. Here are some steps you can follow to get the latest Windows operating system on your computer.
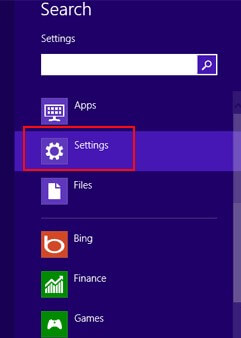
- Open the Start menu and choose the Settings option from the app drawer.
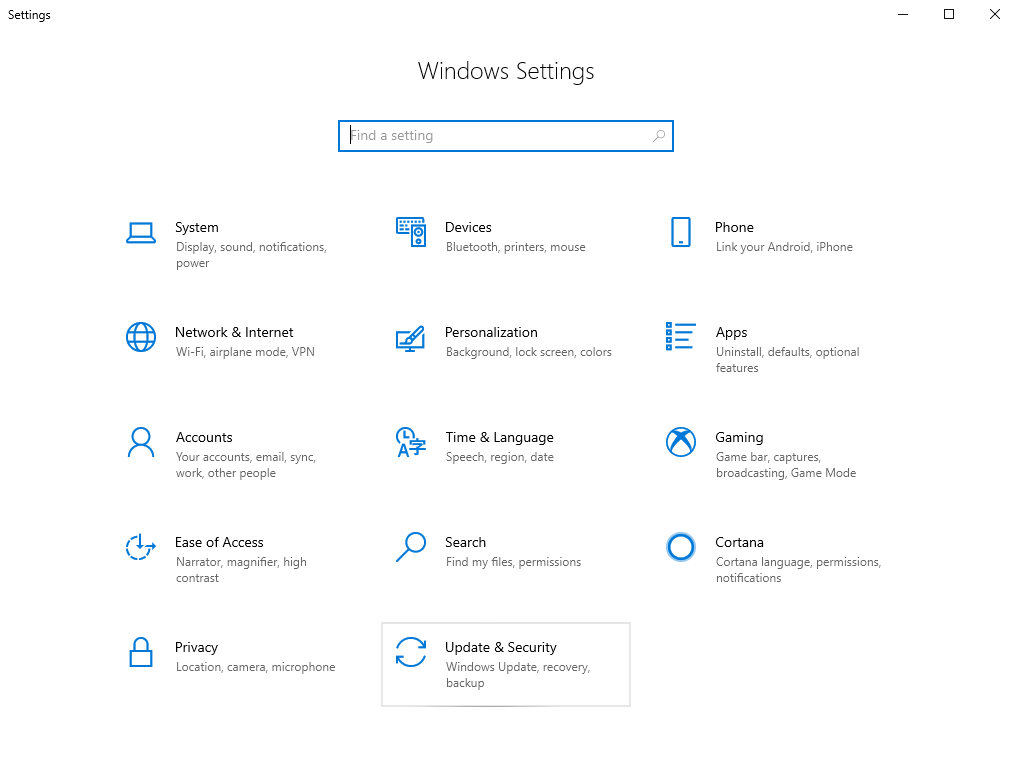
- Navigate to the Update & Security settings on the present on the Settings window.
- click to open the Windows Update tab and then select the Check for Updates button.
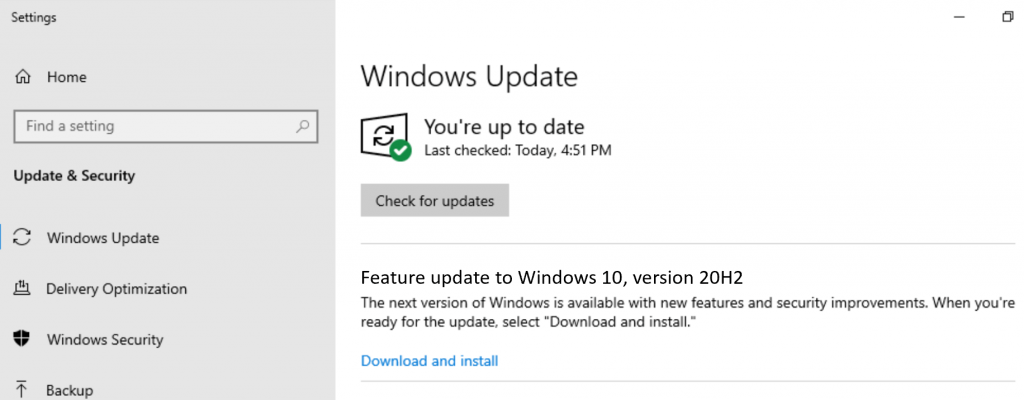
- Now, you have to wait until your computer searches for any new Windows version available. If there’s one, get that version on your computer by clicking on the Download and install button present there.
After getting the updated Windows OS, check if this helped in resolving the Steam game not opening problem. If it’s still there, try out the next solution given below.
Solution 3: Update Drivers In Order To Fix Steam Not Launching Error
Not having updated graphics or display drivers on your computer can also lead to issues like Steam, not opening. Therefore, we would recommend you keep all your drivers updated at all times.
The easiest and quickest way to install the latest Windows drivers on your computer is to use driver updater software. The Bit Driver Updater is the safest app for updating drivers as it is trusted by tons of Windows users.
This driver updater tool does a deep scan of your device to find drivers that are outdated or corrupted. It then gives you new drivers that work best with your device. Also, the software only has drivers that have been tested and approved by WHQL.
There are both free and paid versions of Bit Driver Updater. So, you can use either the free version or the pro version to update drivers. But in its pro version, the job can be done with just a couple of clicks.
Steps To Use Bit Driver Updater To Solve The Steam Not Opening On Windows 10/11
The steps below will provide you with a download link to get the latest version of the application. Also, they will guide you to use it and fix the Steam not launching issue.
- Get the latest version of Bit Driver Updater from the link below:

- Go to the Downloads folder and double-click on the setup file. Follow the setup instructions to install the app on your computer and then launch it.
- Click on the Scan tab from the left-hand side pane. This will allow the app to look for drivers that need an update.
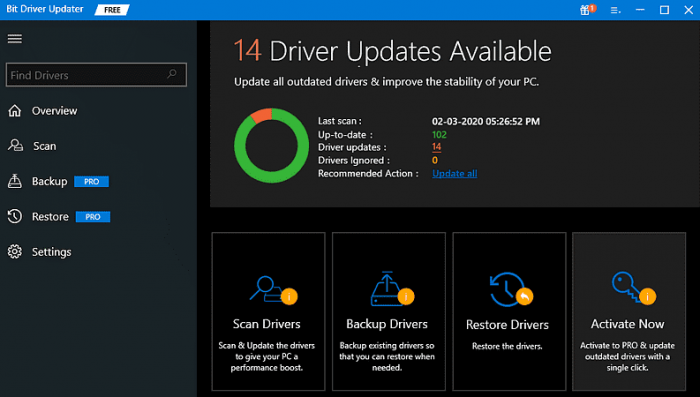
- Now, a list of outdated drivers will be displayed to you, select the Update All option to update all the drivers one by one.
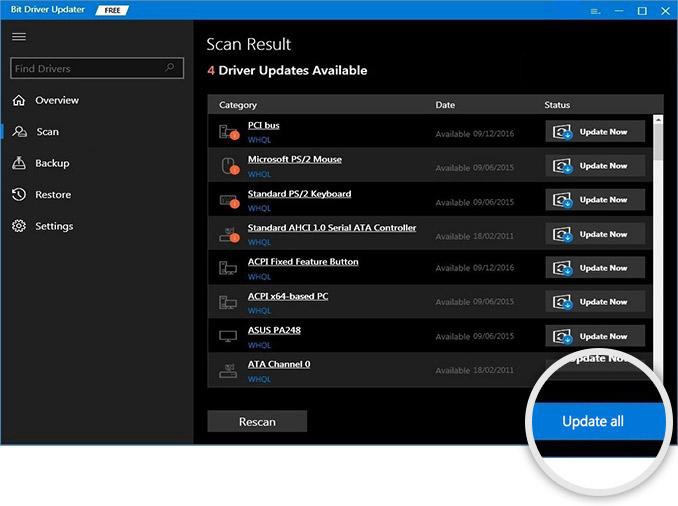
Restart the computer once the update is complete and it will automatically install the new drivers for you. Now, check if the Steam game, not an opening problem is solved. If not, move on to the next step.
Also know: How To Fix Warzone Mic/Voice Chat Not Working On Windows PC
Solution 4: Use The System Restore Option Overcome The Issue
When you use the system restore tool, you can reset any kind of changes you may have done on your Windows device recently. This should put your computer back to how it was before you changed it. Below we have shared a path that you can follow in order to get rid of the Steam not opening error.
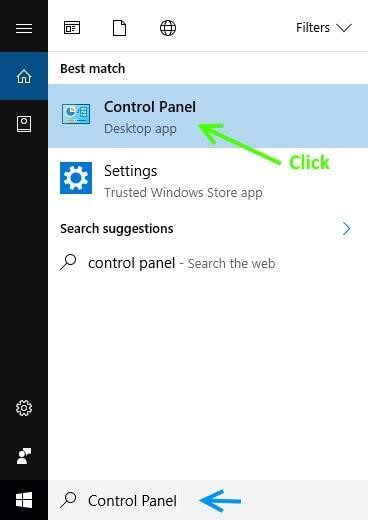
- Open the program called “Control Panel” on your computer by searching it in the taskbar.
- Go to the System and Security. Then, click on the System settings choice to pick it. This will open a new System Settings window.
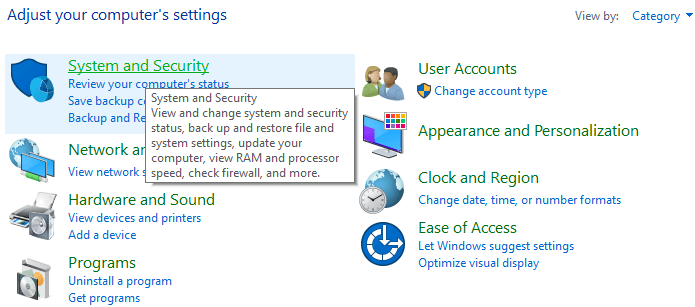
- Now, scroll down and choose About from the panel on the left.
- Under “Related Settings” on the right-hand pane, click once on thebutton.
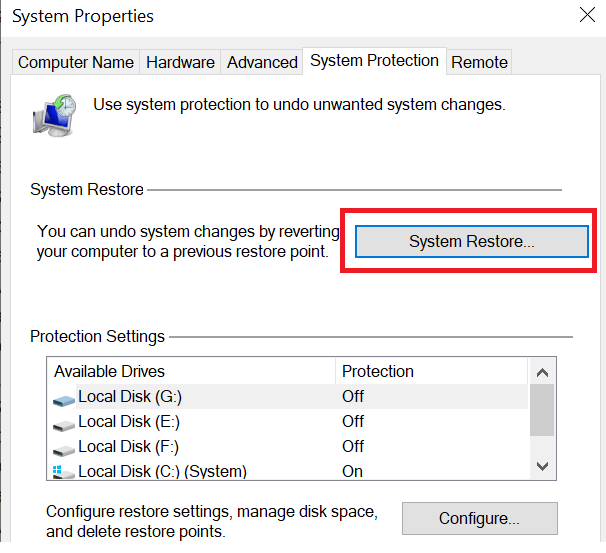
- This will bring up a small window. Click the System Restore button in that window.
- A new system restore window will appear, click the Next button.
- Choose the point to restore, and then again, click Next to move on.
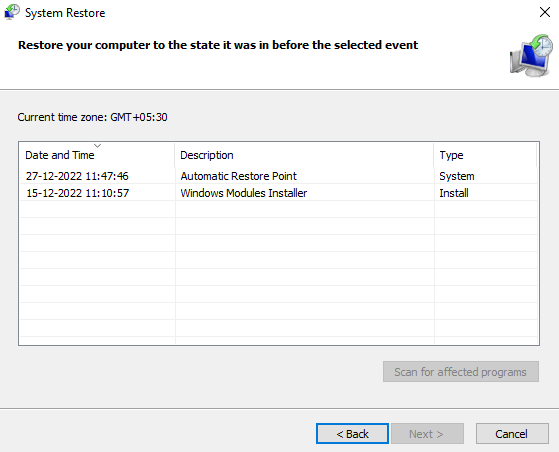
When everything is done, restart your computer, and the steam not launching error will be resolved.
Solution 5: Reinstall The Steam Application To Fix the Steam Not Opening Issue
If none of the above solutions worked, your only option left is to reinstall the Steam client. Since your Steam not opening on Windows 10/11 computer, let’s try to reinstall it. If we download and install a new setup file on top of the old one, we should still be able to play all of your games without having to install them all over again. The steps below will help you to do so:
- Open Control Panel by typing it in the taskbar’s search box and pressing the Enter key.

- Click on the Programs option present on the Control Panel window. Then, go with the Programs and Features option and it will open a list of downloaded applications.

- Right-click on the Steam program and select the Uninstall option from the context menu.
- Again, go for the Uninstall option on the new pop-up window.
- Now, open any web browser, and get the latest version of Steam available online.
After performing the process, restart the computer and it will resolve the Steam not opening issue.
Also know: How to Fix Overwatch 2 Not Launching on Windows 11, 1O PC
Resolved: How To Fix Can’t Open Steam Issue On Windows
Hopefully, the methods shared in this article have helped you get rid of the Steam not opening error. If you are facing difficulties performing any of the above methods, contact us by writing your query in the comment box.
Snehil Masih is a professional technical writer. He is passionate about new & emerging technology and he keeps abreast with the latest technology trends. When not writing, Snehil is likely to be found listening to music, painting, traveling, or simply excavating into his favourite cuisines.



![How to Update and Reinstall Keyboard Drivers on Windows 10/11 [A Guide]](https://wpcontent.totheverge.com/totheverge/wp-content/uploads/2023/06/05062841/How-to-Update-and-Re-install-Keyyboard-Drivers-on-Windows-10.jpg)
