

In this digital era, where technology evolves at breakneck speed, it’s essential to stay on top of the latest driver updates and optimizations. Outdated drivers can cause various issues, from system crashes to poor performance. Lenovo is renowned for its commitment to providing regular updates and improvements for its laptops’ drivers. But do you know how to access and download these updates efficiently?
In this comprehensive guide, we will explore the multiple methods available to acquire Lenovo ThinkPad drivers for your Windows 10/11 PC. So, get ready to unleash the full potential of your Lenovo ThinkPad by keeping those drivers up to date! Join us as we embark on this driver discovery journey, exploring the various methods to download Lenovo ThinkPad drivers for your Windows 10/11 PC.
Most Effective Ways To Download and Update Lenovo ThinkPad Drivers
This article delves into the different methods available for downloading Lenovo ThinkPad drivers for your Windows 10/11 PC, guiding you through the process to ensure you have the necessary tools to maximize the potential of your device.
Method 1: Download Lenovo ThinkPad Drivers via Device Manager
Device Manager is a management console in the Windows operating system that allows you to view and control the hardware attached to your computer. It provides a centralized interface to manage and update device drivers, disable or enable devices, view device properties, and troubleshoot hardware issues.
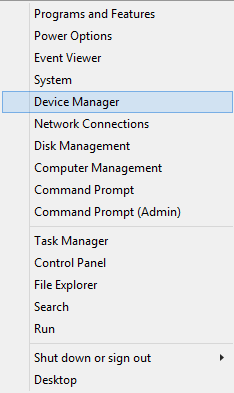
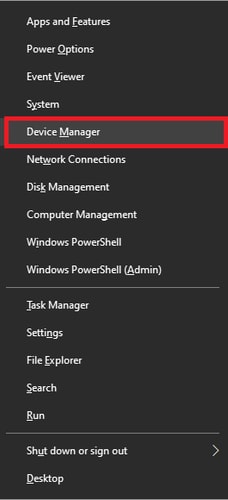
- Press the Windows key + X on your keyboard and select “Device Manager” from the menu that appears. Alternatively, you can search for “Device Manager” in the Start menu search bar and open it.
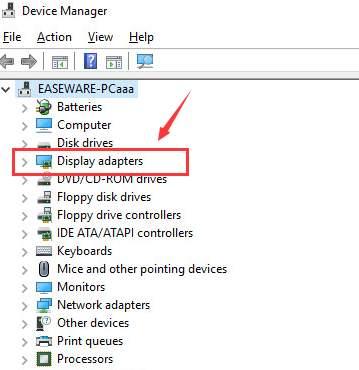
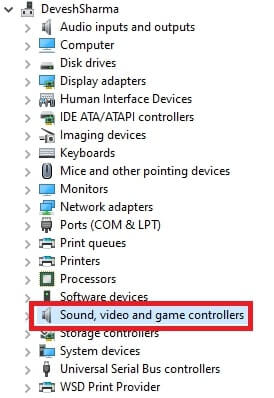
- In the Device Manager window, you will see a list of all hardware devices connected to your computer. Find and expand the category related to the specific driver you want to download and install. For example, if you want to download and install a graphics driver, expand the “Display adapters” category.
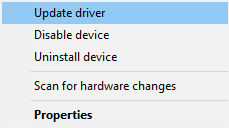
- Right-click on the specific device for which you want to install the driver and select “Update driver” from the context menu. This will open the Update Driver Software wizard.
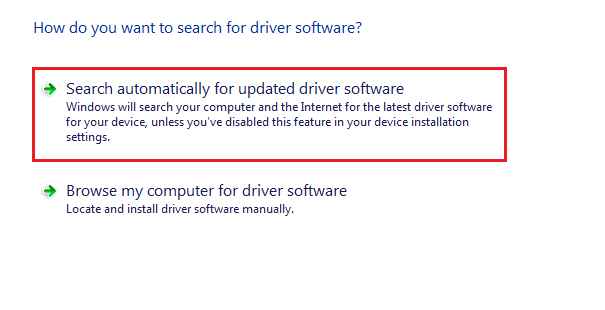
- In the Update Driver Software wizard, select the option “Search automatically for updated driver software.” Windows will now search for the latest available driver for the selected device.
- If Windows finds an updated driver, it will automatically download and install it for you. Follow the on-screen instructions to complete the installation process.
After successfully completing these steps, the Lenovo ThinkPad driver will be installed on your computer. Repeat the process for any other drivers you want to download and install through Device Manager.
Also Read: How to Fix Lenovo laptop Keyboard Not Working in Windows PC
Method 2: Download And Install Lenovo ThinkPad Drivers via the Manufacturer’s Website
To download and install Lenovo ThinkPad drivers through the manufacturer’s website, follow these steps:
- Open your web browser and go to Lenovo’s official website (https://www.lenovo.com/). Make sure to choose a website specific to your country or region.
- Once on the Lenovo website, find the “Support” or “Support & Downloads” section. This is usually located at the top or bottom of the website’s homepage.
- In the support section, look for a link or button labeled “Drivers & Software,” “Drivers and Downloads,” or similar. Click on that link.
- On the Drivers & Software page, you will likely be prompted to enter your Lenovo ThinkPad model number or search for it. This information can usually be found on the bottom of your ThinkPad laptop or on the original packaging.
- Enter the model number and click on the search or enter button. This will bring up the page with available drivers and software for your specific ThinkPad model.
- Scroll down the page and locate the category or section titled “Drivers.” This section will contain a list or a dropdown menu with various driver options.
- Identify the driver you want to download and install. For example, if you need a graphics driver, look for the appropriate option in the display or graphics section.
- Click on the download button next to the driver you want. The driver file will start downloading on your computer.
- Once the download is complete, locate the downloaded file and double-click on it to start the installation process. Follow the on-screen instructions to install the driver.
- After the installation is complete, restart your computer to apply the changes.
It is always recommended to download drivers from the official manufacturer’s website to ensure compatibility and safety.
Method 3: Lenovo ThinkPad Drivers Download via the Windows Update
Windows Update is a built-in feature of the Windows operating system that helps users keep their system up to date with the latest security patches, bug fixes, and driver updates. It connects to Microsoft servers and automatically checks for updates specific to your system’s hardware and software.
To download and install Lenovo ThinkPad drivers through Windows Update, follow the steps below:
- Connect your Lenovo ThinkPad to the internet.
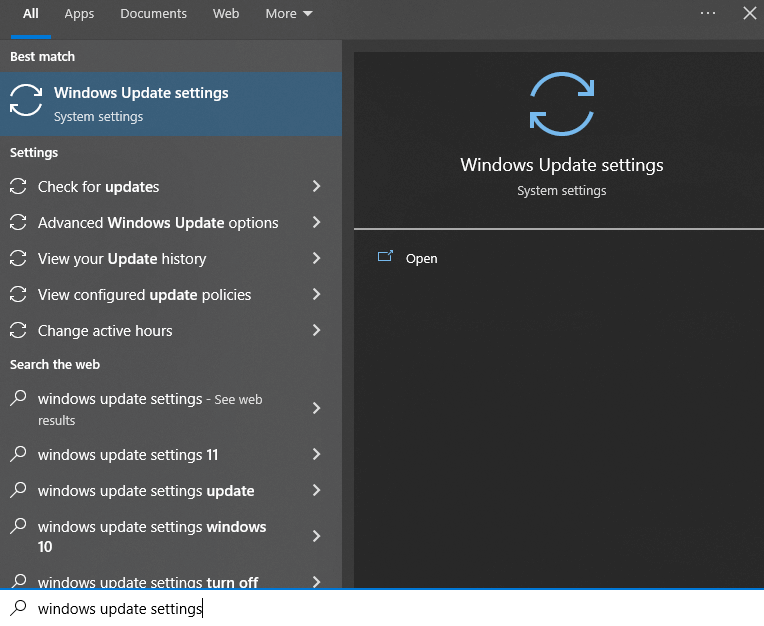
- Click on the Start menu icon (usually located at the bottom left corner of the screen) and type “Windows Update” in the search bar. Then, select “Windows Update Settings” from the search results.
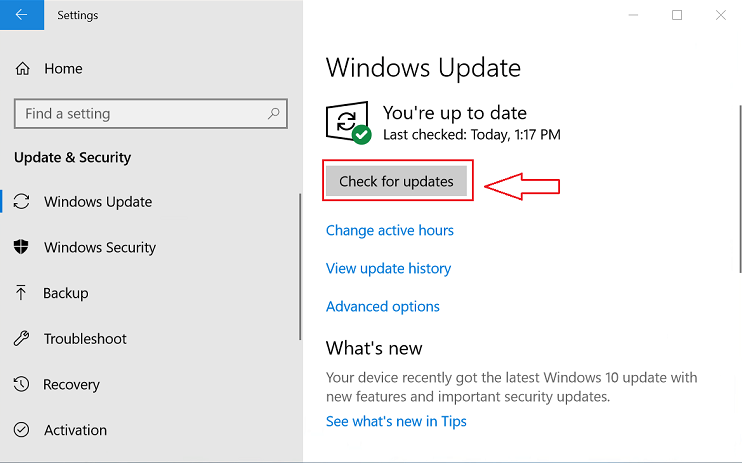
- In the Windows Update settings window, click on the “Check for updates” button. This will initiate the search for available updates for your system, including driver updates.
- Windows will now search for and download any available updates. It may take some time, depending on the speed of your internet connection and the number of updates available.
- Once the updates are downloaded, Windows will prompt you to install them. Click on the “Install updates” button.
- Windows will now install the updates, including the Lenovo ThinkPad drivers.
- After the installation is complete, you may be prompted to restart your computer. If so, save any open work and restart your system.
- Once your system restarts, the Lenovo ThinkPad drivers will be updated and installed through Windows Update.
Windows Update provides a convenient way to download and install these driver updates without manually searching for them on the manufacturer’s website. However, it is worth noting that Windows Update may not always have the latest drivers available, especially if they are brand new or specific to certain hardware configurations. In such cases, it may be necessary to visit the Lenovo support website and manually download and install the drivers.
Also Read: Lenovo Touchpad Not Working on Windows PC? Here’s How To Fix It
Method 4: Download Lenovo ThinkPad Drivers via the Microsoft Catalog
Microsoft Catalog is a website or online platform provided by Microsoft to download and install various software, updates, drivers, and other components for Microsoft products. It serves as a centralized repository for Microsoft-related downloads, making it easier for users to find and install the necessary components.
To download and install Lenovo ThinkPad drivers through Microsoft Catalog, follow the steps below:
- Open a web browser and go to the Microsoft Update Catalog website. You can access it by searching for “Microsoft Update Catalog” in your preferred search engine.
- In the search bar on the Microsoft Update Catalog website, type the specific model of your Lenovo ThinkPad, followed by the keyword “driver.” For example, if you have a ThinkPad X1 Carbon, you can search for “ThinkPad X1 Carbon driver.”
- A list of available drivers for your Lenovo ThinkPad model will appear. Browse through the list and select the driver you want to download by clicking on the “Add” button next to it.
- Once you have added all the drivers you need to the download basket, click on the download basket at the top right corner of the page.
- On the download basket page, click on the “Download” button next to each driver to start downloading them to your computer. Choose a location to save the downloaded drivers that is easily accessible to you.
- After the download is complete, go to the location where you saved the drivers. You will find them in the form of “.cab” files.
- To install the drivers, you will need to extract the contents of the “.cab” files. To do this, simply double-click on each “.cab” file, and Windows will automatically extract the driver files to a new folder.
- Once the driver files have been extracted, you can manually install them. Right-click on the Windows Start menu and select “Device Manager.”
- In the Device Manager window, locate the device you want to install drivers for. It can be under categories like “Display adapters,” “Sound, video, and game controllers,” etc.
- Right-click on the specific device and select “Update driver.”
- Choose the option to install the driver manually from the location where you extracted the driver files (the folder created when you opened the “.cab” file).
- Follow the on-screen instructions to complete the driver installation.
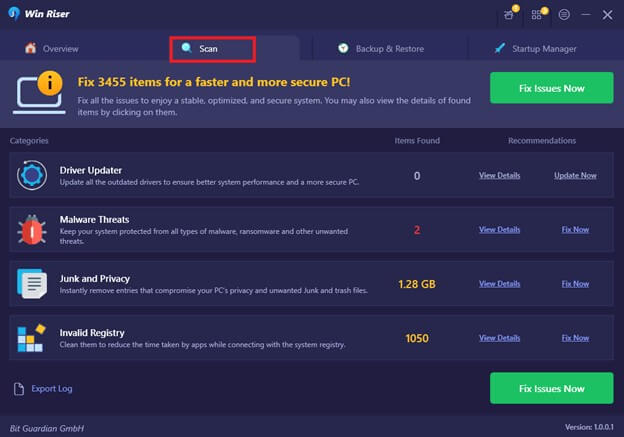
Method 5: Download And Install Lenovo ThinkPad Drivers via the Win Riser Driver Updater
Win Riser Driver Updater helps by scanning your computer for outdated or missing drivers and then automatically downloading and installing the latest versions for you. It eliminates the need to search for drivers manually and simplifies the entire process. By ensuring that all drivers are up to date, the software helps improve system stability, performance, and compatibility with various hardware devices.
To download and install Lenovo ThinkPad drivers through Win Riser Driver Updater, follow these steps:
- Download the Win Riser Driver Updater from the link below:

- Once the download is complete, run the installer and follow the on-screen instructions to install the software.
- After the installation is complete, launch Win Riser Driver Updater on your computer.
- In the main interface of the software, you will see an option to scan for outdated or missing drivers. Click on the “Scan Now” or “Scan” button to initiate the scan.
- The software will analyze your computer’s hardware and identify any outdated or missing drivers, including Lenovo ThinkPad drivers.
- Once the scan is complete, you will be presented with a list of drivers that need to be updated. Locate the Lenovo ThinkPad drivers on the list.
- Select the Lenovo ThinkPad drivers you want to update and click on the “Update” or “Download” button next to them. This will initiate the download and installation process.
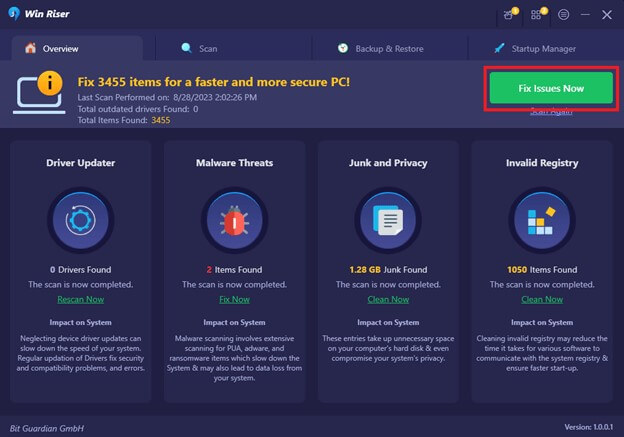
- Win Riser Driver Updater will automatically download the latest version of the selected drivers from the official manufacturer’s website.
- Once the download is complete, the software will install the drivers on your computer, ensuring compatibility and optimal performance.
Download and Update Lenovo ThinkPad Drivers: Successful
The availability of different methods for downloading Lenovo ThinkPad drivers for Windows 10/11 PCs is a boon for users seeking to enhance their computing experience. Whether you opt for the official Lenovo website, Windows Device Manager, or automated driver update software like Driver Easy, each method enables you to easily access and install the latest and most compatible drivers for your ThinkPad device.
Regardless of the method you choose, regularly updating your Lenovo ThinkPad drivers is crucial for maintaining the optimum performance and stability of your PC. By having the latest drivers installed, you not only ensure that your laptop is running smoothly but also enjoy enhanced security and compatibility with the latest software and hardware.
Snehil Masih is a professional technical writer. He is passionate about new & emerging technology and he keeps abreast with the latest technology trends. When not writing, Snehil is likely to be found listening to music, painting, traveling, or simply excavating into his favourite cuisines.


![How to Update and Reinstall Keyboard Drivers on Windows 10/11 [A Guide]](https://wpcontent.totheverge.com/totheverge/wp-content/uploads/2023/06/05062841/How-to-Update-and-Re-install-Keyyboard-Drivers-on-Windows-10.jpg)
