A one-stop guide on fixing hardware and software problems behind headphones Jack not working Windows 10.
It can be hard to set up sound devices on Windows. Sometimes, Windows can mistake one type of sound output for another which can result in problems like the headphone jack not working in Windows 10. If this happens, you may need to check your sound as well as other settings to figure out the reason causing this issue.
Ideally, you should be able to plug in a sound device and have it work right away, but if that doesn’t happen, this guide will come to your rescue. There can be various reasons why your Windows 10 headphone jack not working. However, there are methods which you can follow in order to get rid of this problem. So without any further ado let’s take a look at these fixes.
Different Techniques To Fix The Windows Headphone Jack Not Working Issue
The first thing to look at is whether the issue is in the hardware or the software, once you get that it shouldn’t take long to fix the computer headphone jack not working in Windows 10. The below fixes will help you solve the problem, so if you are not sure what’s wrong, just go through the list and deploy the fixes consecutively.
Fix1: Isolate The Windows 10 Headphone Jack Not Working Issue
Before trying to fix the laptop headphone jack not working in Windows 10 with troubleshooting software, it’s important to make sure that the problem isn’t caused by hardware. If that’s the case, you’ll probably need to buy new headphones or take yours to a repair shop, because the fixes below probably won’t work.
When your computer headphone jack not working Windows 10, the problem could be with either the headphones or the port you plug them into. First, try plugging the headphones into a different port to see if they work. If your headphones still don’t work, it’s likely a sign that you need new ones.
In case they work on another device, try plugging them into a different audio port on the same PC where they don’t work. If they start working all of a sudden, it means that the headphone jack not working Windows problem is due to the first port. You can just use your headphones with the new port, or you can keep reading for a list of fixes.
Also know: How To Fix Warzone Mic/Voice Chat Not Working On Windows PC
Fix2: Use The Troubleshooter To Resolve Headphone Jack Not Working Windows 10
If your Windows 10 headphone jack not working properly, then you can try using the troubleshooter tool. Windows troubleshooter is one of the most useful integrated utilities. This tool helps you find and fix errors and problems with your computer. To know how to use this tool, you need to follow these steps.
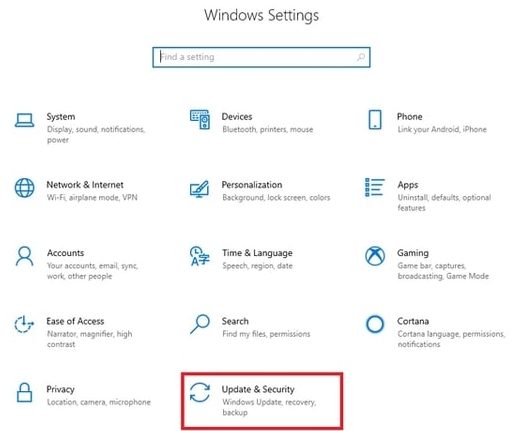
- Right-click on the Start menu (Windows icon in the bottom-right corner) and select the Settings option from the list of options.

- On the Settings window, choose the Update & Security option
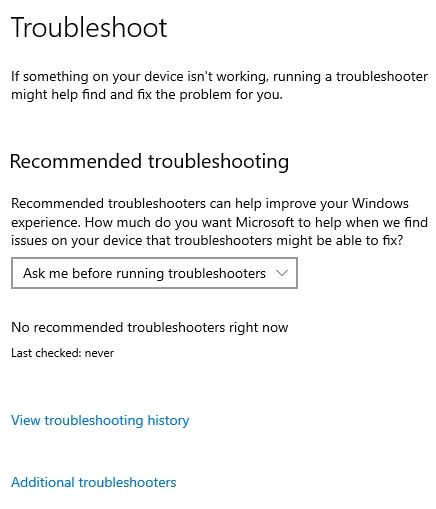
- Now, select the Troubleshoot tab from the left-side panel. And then click on the Additional troubleshooter’s button present on the right-side panel.
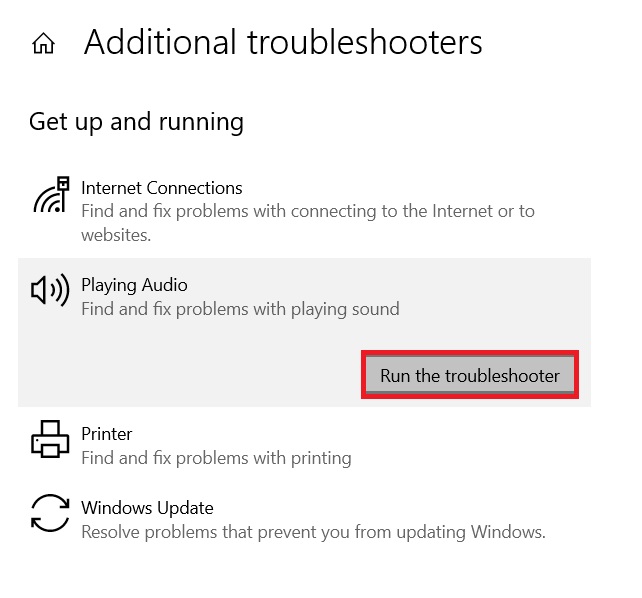
- Under the “Get up and running” heading, click on the Paying Audio option in order to expand it.
- Then, click on the Run the troubleshooter button to start the process.
- Follow the on-screen instructions to fix the problem.
After completing the process, Restart your computer and check if the headphone jack not working Windows issue is resolved. If not, then move on to the next method.
Fix3: Update Audio Drivers And Solve The Headphone Jack Not Working Windows 10 Issue
It is very common that if your Windows drivers are not up-to-date you will face issues like the headphone jack now working on Windows 10. Most people think that their drivers get updated while updating their Windows OS, but this is not the case.
Keeping your Windows drivers updated allows your computer to create a better connection with the hardware devices it is connected to. Continue reading to understand the process of doing so and fix your headphone jack not working Windows issue easily.
Fix Windows Headphone Jack Not Working Issue By Updating Audio Drivers Manually
First, we are going to look at the manual method to update your audio drivers. For that, we need to take the help of a Windows in-built utility called Device Manager. Follow the steps mentioned below to use this tool:
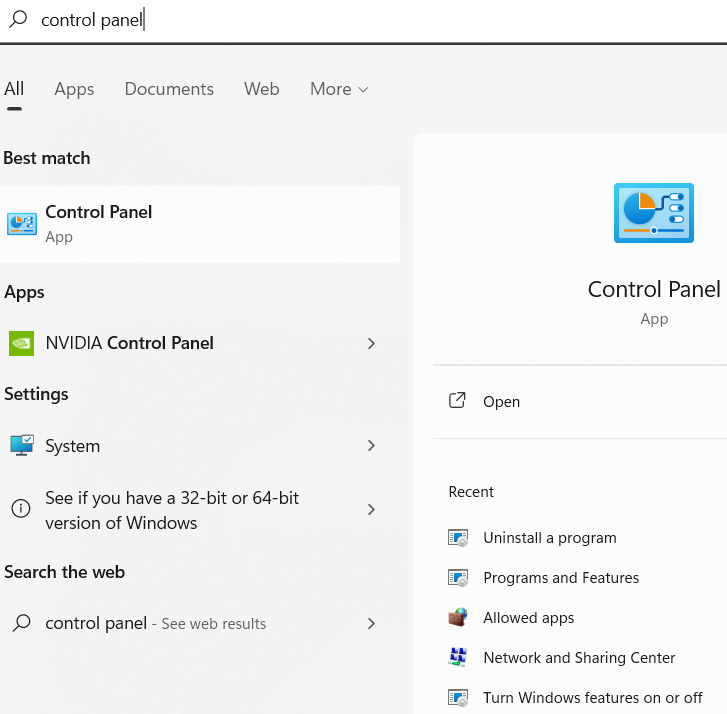
- Type Control Panel in the taskbar’s search bar and then hit the Enter key on your keyboard.
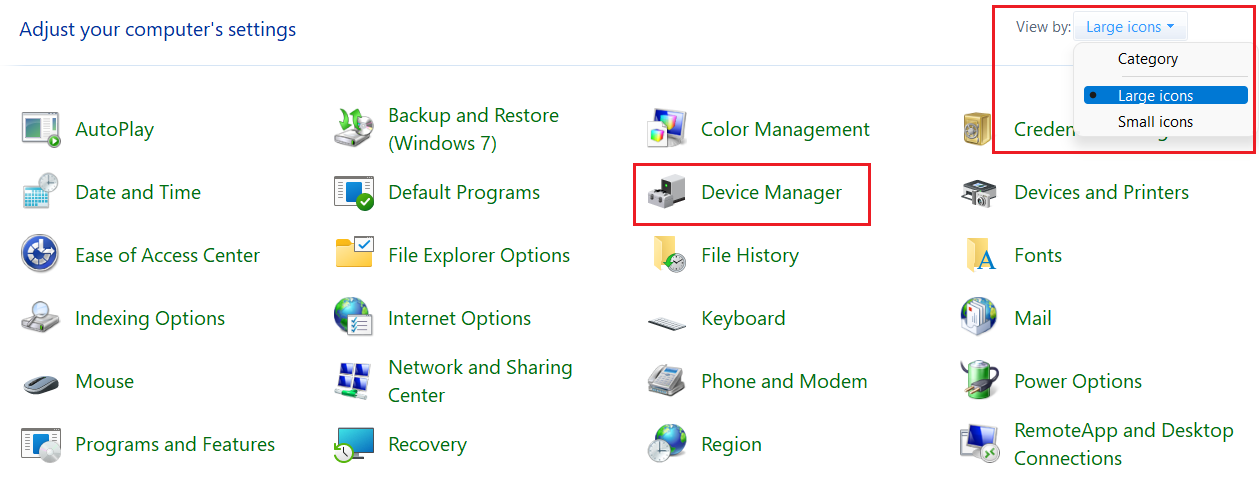
- On the Control Panel window, click on the “View by” dropdown menu and select the Large icons option from the list. Changing the icon’s design will display all the Windows in-built tools.
- Select the Device Manager tool by clicking on it. A new device manager window will open showing all the drivers available on your computer.
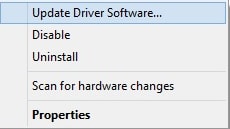
- Click twice on the arrow icon next to the “Sound, video, and game controllers” option to expand it. Then, right-click on the headphone driver that you are using and select the Update driver option from the list.
- A pop-up window will appear, select the “Search automatically for drivers” option.
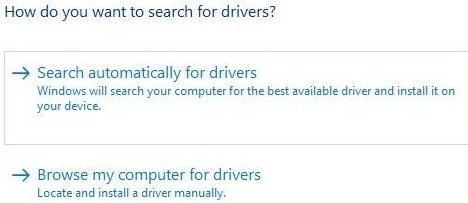
- Wait for a few seconds to let your computer search for new audio drivers. Then, follow the on-screen instructions in order to install audio drivers on your PC.
After finishing the installation process, Restart your computer and check if the headphone jack not working Windows issue is resolved. If you want an easy way out then the next solution is for you.
Also know: How to Fix Logitech G533 Mic Not Working in Windows 10?
Fix Windows 10 Headphone Jack Not Working Issue By Updating Audio Drivers Automatically
In this method, you can simply download and install the best driver updater software like the Bit Driver Updater and let it do the job. This application comes with various tools and features that will help you manage drivers and fix issues like the headphone jack not working in Windows 10. Some of the other advantages of using the Bit Driver Updater are mentioned below:
- Provides 24×7 Support
- One click and all your drivers will get updated automatically
- Allows you to schedule the process
- Creates a backup of existing drivers in case you need them
- Improves your computer’s efficiency
Now, it is time to take a look at some instructions that will help you resolve the Windows 10 headphone jack not working problem.
- Download the Bit Driver Updater application by clicking on the link given below:

- Visit the Downloads folder and run the setup file. Follow the on-screen instructions to install the app on your PC.
- Now, launch the Bit Driver Updater
- Click on the Scan Drivers option present in the middle of the window. This will allow the application to run a scanning process to find all the outdated drivers.
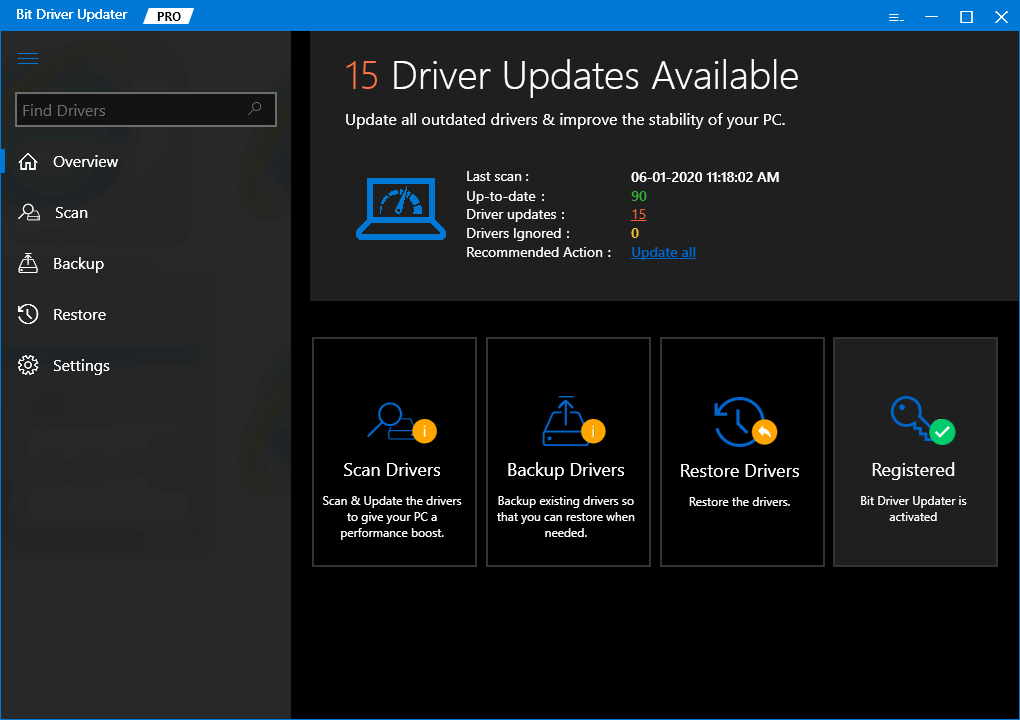
- Then, click on the Update All button in order to update all the drivers at the same time. You can also update individual drivers by clicking on the Update Now button in front of them.

After completing the downloading and installing process for the Windows drivers, Restart your computer.
Resolved: How To Fix The Headphone Jack Not Working Windows 10 Issue
We hope this article helped you fix your headphone jack not working Windows problem. If you need more help, feel free to let us know by leaving a comment in the comments section. We would love to hear from you.
Moreover, We upload guides, driver download blogs, and other informative articles on a regular basis to help you with trouble like the headphone jack not working in Windows 10.
Snehil Masih is a professional technical writer. He is passionate about new & emerging technology and he keeps abreast with the latest technology trends. When not writing, Snehil is likely to be found listening to music, painting, traveling, or simply excavating into his favourite cuisines.



![How to Update and Reinstall Keyboard Drivers on Windows 10/11 [A Guide]](https://wpcontent.totheverge.com/totheverge/wp-content/uploads/2023/06/05062841/How-to-Update-and-Re-install-Keyyboard-Drivers-on-Windows-10.jpg)
