
One of the most efficient and well-known brands you hear when it comes to printers is Xerox Fuji. The business has established itself very prominently in a professional environment.
Hence, the Fuji Xerox printer is one of the top printers available in the market. They are trustworthy, safe, and output-oriented.
Additionally, it is accessible for numerous operating systems, including Windows, Linux, and Mac. Additionally, it is compatible with Windows’ 64-bit edition and supports a number of different languages.
However, a lot of users occasionally experience issues because of the outdated Fuji Xerox printer driver. Hence, if you are facing the same issue, then you are at the right place.
Here, in this article, we’ll go through different methods for Fuji printer driver download, install, and update on Windows 11,10. Also, this guide will ensure that you do not face any difficulties or errors because of corrupt, missing, or out-of-date drivers. So, let’s begin!
Different Ways for Fuji Xerox Printer Driver Download and Update
Below are manual as well as automatic ways that might help you in downloading and updating your printer drivers easily on the Windows system.
Method 1: Download and Install Fuji Drivers from Official Website
One of the best and safest ways for driver downloads is through their respective manufacturer’s official website. Downloading the required drivers directly from the official website will ensure that the drivers installed are appropriate, compatible, and safe for your system.
Hence, for the Fuji Xerox printer driver download process, you may move to Fuji’s official website. To download the drivers without any errors, follow the steps given below:
- Open Fuji’s official support page on your browser.

- Then, choose your desired operating system and also the language from the drop-down menu. Then, click on the Apply Filter option.
- Now, look for your desired Fuji printer driver and then hit the Download button below it.
This will start the download process of a driver set-up file. After that, double-click on the file, run it, and install it on your system using the on-screen instructions. Finally, reboot the PC to confirm the changes.
Also know: Download Epson L360 Resetter Tool or Adjustment Program for Free
Method 2: Perform Fuji Xerox Printer Driver Update through Device Manager
Device Manager is a feature of Windows that effectively controls the operation of all the system’s hardware and software components. Additionally, it assists in resolving numerous system problems by replacing old, missing, or damaged drivers. Therefore, you may use this utility to quickly and simply update the Fuji Xerox printer driver on a Windows PC. To do this, adhere to the steps given below:
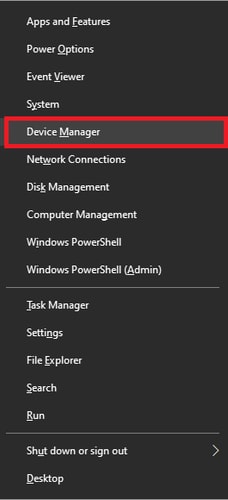
- Open Device Manager using the Windows and X key and choosing the relevant option from the context menu.
- Then, look through the list of devices and double-click on the Print Queues option in order to expand it.
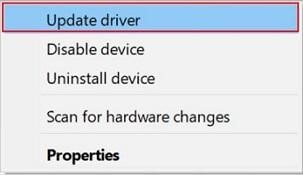
- Now, in the expanded menu, right-click on your desired Fuji printer driver and pick the Update Now option.
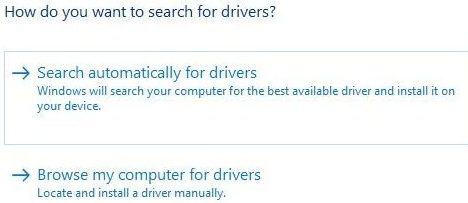
- Then, pick the Search automatically for drivers option.
Wait until your Windows system installs the latest drivers after searching for them. Finally, reboot the system to confirm the changes.
Also know: How To Fix printer printing blank pages On Windows?
Method 3: Upgrade Windows for Fuji Xerox Printer Driver Update
You can always attempt this approach even though it isn’t always successful. We all know that Windows software updates keep all the system’s software and hardware components up to date. Additionally, software updates assist in resolving several system bugs and unwanted errors.
Therefore, you can follow the instructions listed below for the Fuji Xerox printer driver update on Windows 11/10.
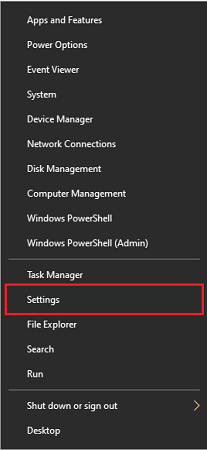
- Open Settings using the Windows and X key and choose the relevant option from the context menu.
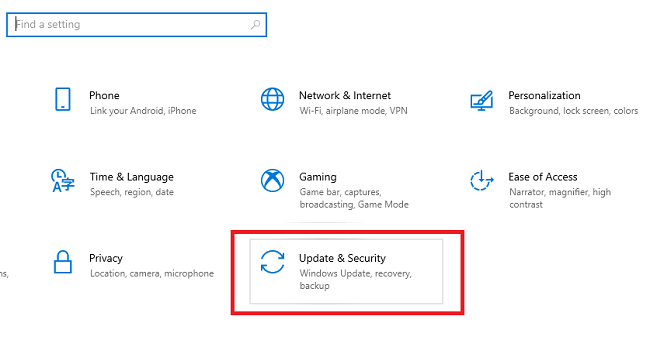
- Then, find the Update and Security option and select it.
- Now, move to the Windows update section and choose the Check for updates option.
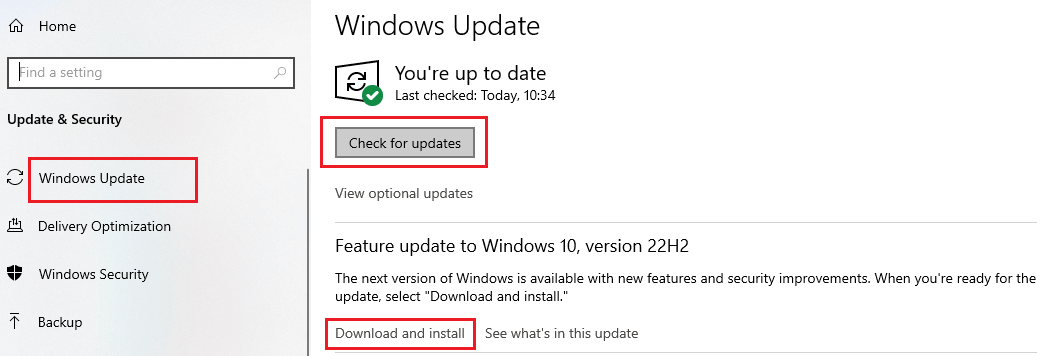
Wait until the system prompts you to install any updates that have been found. Run and install any updates that are readily available right away. Finally, reboot the system to confirm the changes.
Method 4: Automatic Way for Fuji Xerox Printer Driver Install and Update
All three aforementioned manual techniques required a high level of technical expertise, hard work, and time. However, lots of people lack the necessary time and knowledge. As a result, people are constantly looking for a quick and automated approach to obtain and update the Fuji Xerox driver.
So here it is—the automatic, efficient, and highly recommended way to update drivers. You will need to download Bit Driver Updater, one of the most well-liked automatic free driver updaters. Millions of users throughout the world rely on and use this application due to its wonderful features.
This software’s ability to exclusively install WHQL-certified drivers is one of its best features. It also offers the option of backup and restore. Additionally, there are free and premium versions of this application. Additionally, a 60-day return policy is provided for this application.
So let’s have a look at a step-by-step tutorial for using Bit Driver Updater to download and update every system driver.
Step-by-step instructions for Fuji Xerox printer driver install using Bit Driver Updater
- Use the download button provided below to get the Bit Driver Updater.

- Run the setup file as soon as the download is finished. Follow the on-screen directions to install the application. Launch the application after installation.
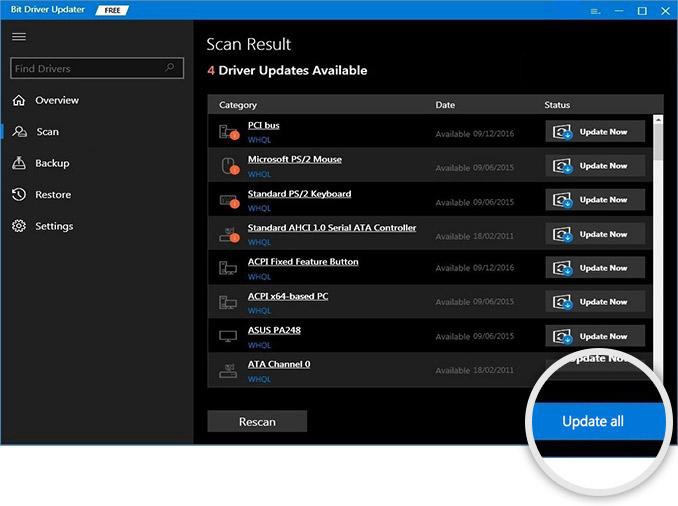
- Following that, select the Scan Drivers option from the screen. This will direct the application to perform a full system scan and produce a list of any outdated drivers.
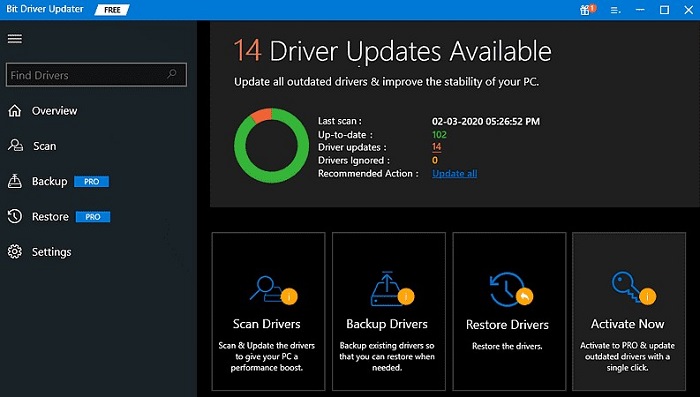
- Next, you may start the update process. To do so, look for your Fuji printer driver and select the Update Now button near it. To update all of the listed drivers at once, you can also press the Update All option.
Let the updating procedure complete. After that, restart your computer to verify the changes.
Also know: How to Fix Print Spooler Keeps Stopping on Windows PC
Wrapping Up: Fuji Xerox Printer Driver Download, Install And Update
To sum up, the techniques listed above were all quick, simple, and efficient ways to download, install, and update the Fuji Xerox printer driver for Windows 11/10. You are free to use any method that works for you. But based on our recommendation, the fastest and easiest option is the automatic one that uses the Bit Driver Updater. If you run into any problems while using any of the above methods please let us know in the comments section below.
Snehil Masih is a professional technical writer. He is passionate about new & emerging technology and he keeps abreast with the latest technology trends. When not writing, Snehil is likely to be found listening to music, painting, traveling, or simply excavating into his favourite cuisines.


![How to Update and Reinstall Keyboard Drivers on Windows 10/11 [A Guide]](https://wpcontent.totheverge.com/totheverge/wp-content/uploads/2023/06/05062841/How-to-Update-and-Re-install-Keyyboard-Drivers-on-Windows-10.jpg)
