

If you are facing a monitor not detecting HDMI error on your Windows 10 device, then this article will help you with some tips and tricks to fix this issue.
The best way to connect your PC to a monitor is to use an HDMI connection. It makes the screen-changing functions smoother and you can work on a second screen without any lag. However, problems like “HDMI monitor not detected” can happen when your PC doesn’t recognize the monitor. Today, we’ll show you the best ways to fix Windows 10 so that your HDMI TV or monitor will work again.
But before you try our solutions, you should first try some simple troubleshooting steps. You should make sure that the HDMI cable is plugged in correctly. Remove the HDMI cable from your computer, restart it, and then plug the cable back in. You should also check to make sure that the HDMI ports aren’t blocked by dust or other debris. Also, clean these ports with a soft-bristled brush. If everything is fine but the monitor still won’t pick up the HDMI signal, move on to the fixes.
Different Methods To Fix The Monitor Not Detecting HDMI On Windows
Below are some fixes that will help you get rid of the Windows 10 not detecting HDMI monitor problem.
Method1: Check The Display Manually To Fix HDMI Monitor Not Detected Error
If you are connecting an older monitor to your computer, your Windows OS might not recognize it right away. In this case, Windows gives you the option to manually find any monitor or screen externally connected to your computer. Just follow the steps below, and you will be able to fix the monitor not detecting HDMI error messages.
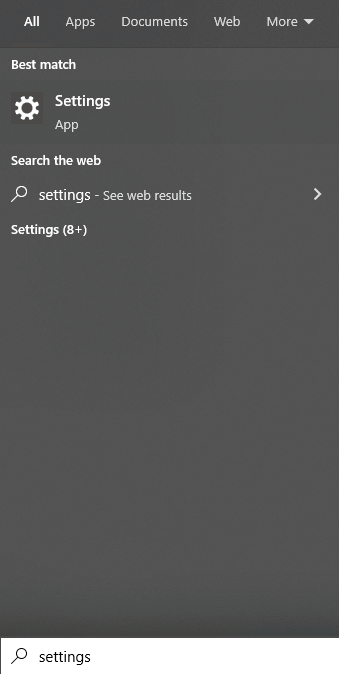
- Click on the Start menu and type Settings in the search bar, then press the Enter key on your keyboard
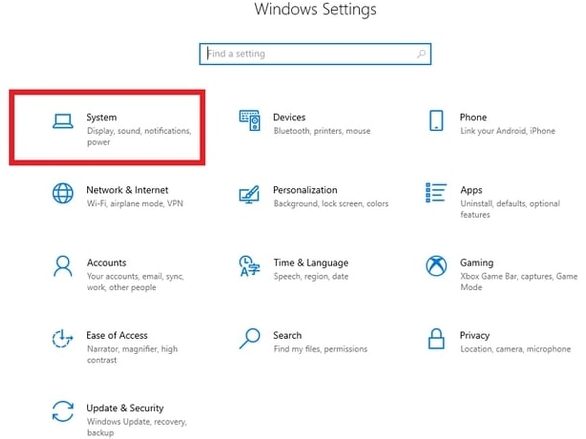
- On the Settings window, select the System settings option
- Now, choose the Display tab present on the left-side panel. And then on the right-side panel, click on the Detect button, under the “Multiple Displays” heading.

Wait for some time and let your computer detect your monitor. However, if this doesn’t recognize your display unit and you are still facing the same HDMI monitor not detected error, then move on to the next fix.
Method2: Check The Display Projection Settings To Solve The Monitor Not Detecting HDMI Error
You can choose from a number of projection settings in Windows 10, such as the Second screen only, Duplicate, Extended, and PC screen only. If your monitor not detecting HDMI, your projection settings might be set to “PC Screen only.” Changing to a different projection setting will fix the problem where the HDMI not detecting monitor. To open the Projection Settings menu, just press “Windows Key + P” or type “Projection Settings” into the Windows search bar. When the settings menu comes up, choose the projection mode you want to use.
- PC Screen Only: With this setting, your internally connected screen will only show up on your PC and not on any other screen. If you are facing the HDMI monitor not detected issue, you might have chosen this option.
- Duplicate: If you choose this option, your PC screen will be shown on the second display unit.
- Extend: Choose Extend if you want your display to go across two monitors. Your screen will be split into two parts that are the same size and shown on both monitors.
- Second Screen Only: If you choose this option, your display will only show up on the second monitor.
Also know: How to Fix Monitor Randomly Goes Black on Windows
Method3: Update The Display Driver And Resolve The Monitor Not Detecting HDMI Error
When HDMI not detecting monitor, one of the most common reasons is that the display driver is outdated or corrupted. If you want your monitor to work smoothly with the OS and apps, you need to make sure you have an up-to-date display driver installed on your computer.
With the help of Device Manager, you can update your display driver manually. You can manage all kinds of drivers with this tool and can download, reinstall, roll back, and update them. Here are some steps to help you update your display driver and fix the Windows 10 not detecting HDMI monitor problem.
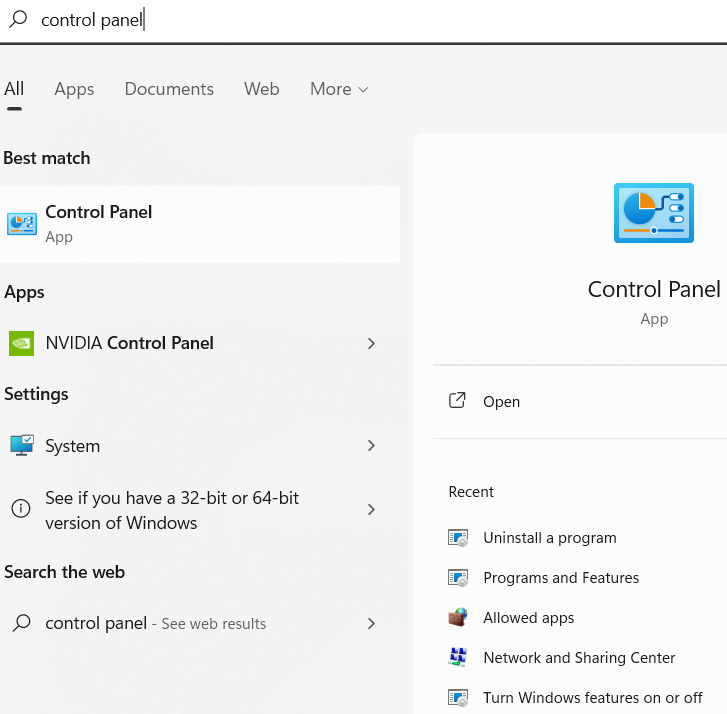
- Click on the Start button present at the button-left corner of your screen. Then, type Control Panel in the search bar and hit the Enter key on your keyboard.
- On the Control Panel window, single-click on the “View by” dropdown menu and select the Large icons option. This will change the icon’s design, showing all the in-built tools in your computer.
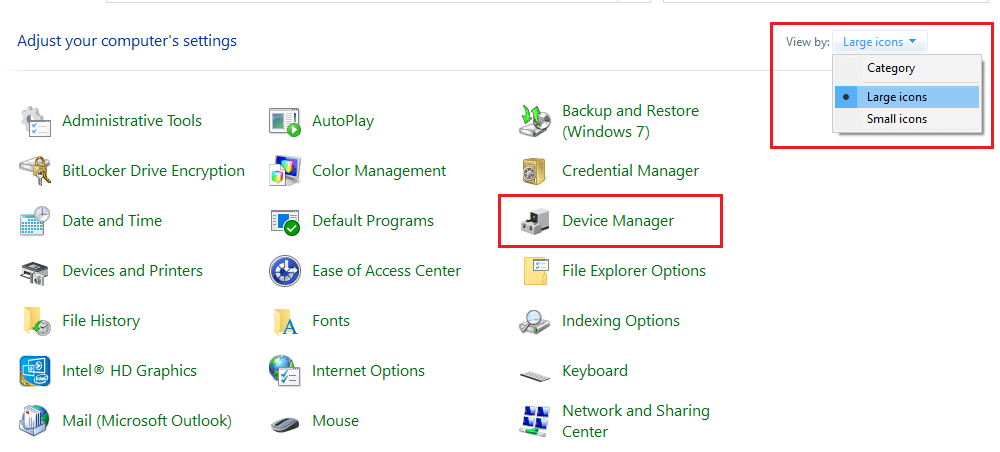
- Select the Device Manager tool by clicking on it.
- A new window will open, showing all the drivers present on your Windows device. Click on the Display adapter option in order to expand it.
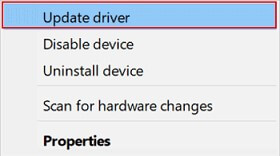
- Then, right-click on the graphics driver and select the Update driver option from the context list.
- Now, click on the “Search automatically for drivers” option on the new pop-up window
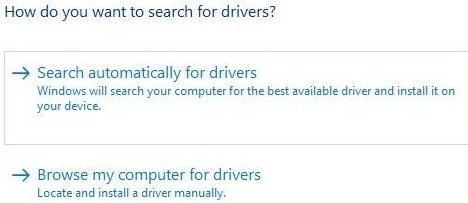
- Wait for some time till your computer searches for new drivers. Then, follow the on-screen instructions to download the latest drivers on your PC.
After completing the downloading process, Reboot your Windows device and it will automatically install the new display driver for you and fix the monitor not detecting HDMI issues. If in case you feel the above two methods are a bit too technical or complicated for you, then the next method is for you.
Method4: Fix Monitor Not Detecting HDMI Issue By Updating Drivers Automatically
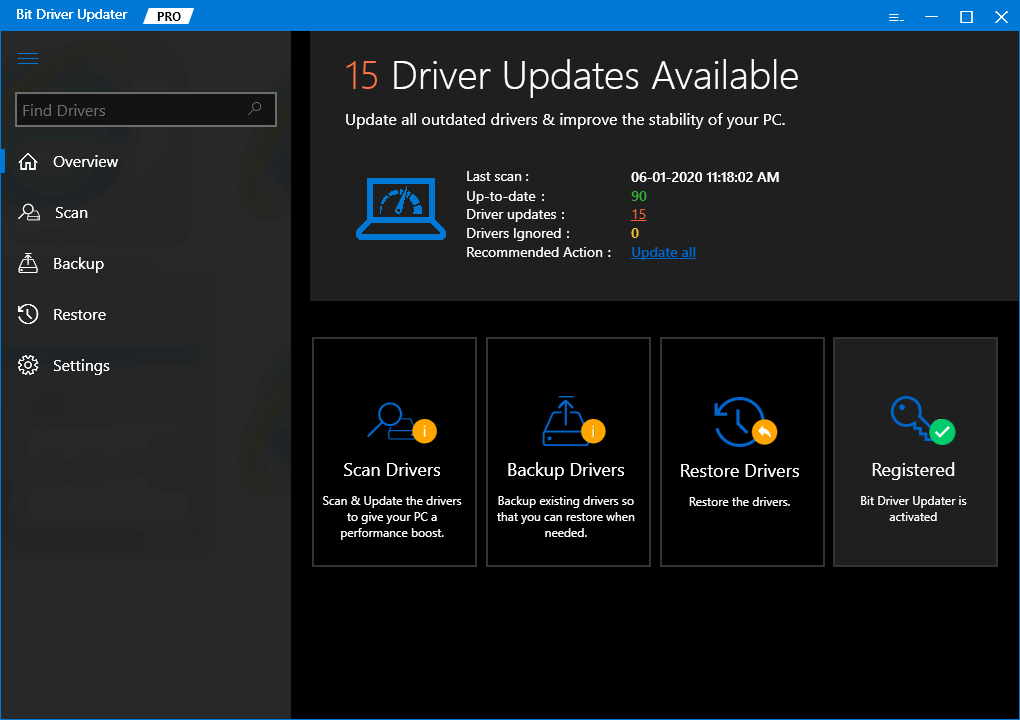
We would recommend you keep all of your drivers updated so that your computer doesn’t have problems like HDMI not detecting monitor. Using driver updater software is the best way to update your drivers automatically. We would suggest that you use a reliable and secure app like the Bit Driver Updater app. This app is trusted by many users and has several features to make the process easier.
Bit Driver Updater will automatically look for missing, corrupted, faulty, or outdated drivers. Updating drivers will help you fix BSOD, glitches, and errors like the HDMI not detecting monitor. Here are some additional advantages of using this app:
- Schedule the process as per your requirement
- A single click will update all your drivers automatically
- Improves your computer’s overall performance
- User-friendly interface
- Backup old drivers in case you want them back
Steps To Use Bit Driver Updater
Now, it’s time to look at the steps to download and use the Bit Driver Updater app and resolve the monitor not detecting HDMI errors.
- In order to use the Bit Driver Updater app, first download it from the link below:

- After the downloading process is finished, search File Explorer in the taskbar’s search bar and then hit the Enter key on your keyboard.
- On the File Explorer window, open the “Downloads” folder. Now, you will see all the downloaded files on your screen.
- Run the Bit Driver Updater setup file. And then, follow the instructions displayed on your screen to install it on your computer.
- Once the application is installed, Open it on your computer
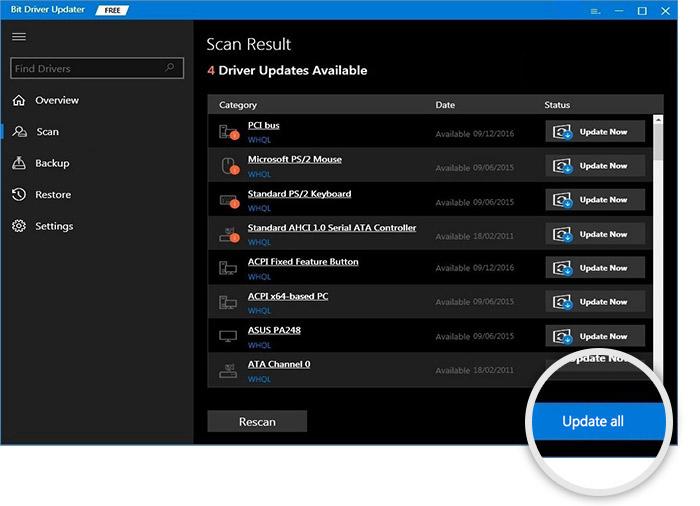
- Now, you can click on the Scan tab present in the left-side panel. Or else click on the Scan Driver button in the middle of the window.
- Let it scan for all the faulty, outdated, corrupted, and missing drivers on your PC. Then, click on the Update Now button in front of the display driver to download and update the driver at the same time. You can also click on the Update all button to update all of your Windows drivers simultaneously to fix the monitor not detecting HDMI issues.
- Wait for a few moments as it may take some time. Then, Restart your computer and you will see that the HDMI monitor not detected issue is resolved.
Also know: AOC Monitor Driver Download and Install in Windows 11, 10 [Easily]
Monitor Not Detecting HDMI Error Fixed On Windows 10/11
We hope you were able to fix the “HDMI monitor not detected” error on your Windows device with help of the above solutions. But if there is a problem with the PC’s hardware, take it to the nearest repair shop. You can also get help from a professional by contacting Windows Support.
Tell us what you think about this post in the comments section. we’d love to hear from you. Also, if you want to read more articles about technology, you can subscribe to the Free Driver Updater blog.
Snehil Masih is a professional technical writer. He is passionate about new & emerging technology and he keeps abreast with the latest technology trends. When not writing, Snehil is likely to be found listening to music, painting, traveling, or simply excavating into his favourite cuisines.


![How to Update and Reinstall Keyboard Drivers on Windows 10/11 [A Guide]](https://wpcontent.totheverge.com/totheverge/wp-content/uploads/2023/06/05062841/How-to-Update-and-Re-install-Keyyboard-Drivers-on-Windows-10.jpg)
