
This article provides a number of ways to uninstall NVIDIA drivers on Windows 10, with detailed instructions on how to do so.
Without strong graphics or video cards, it would be practically impossible to operate some of today’s most graphically demanding programs, such as high-end online PC games. When we talk about graphics cards, NVIDIA comes out as the most popular and largest graphic card manufacturer worldwide. The majority of gaming desktops and laptops utilize NVIDIA graphics cards.
These heavily-stacked GPU cards have evolved over time to become more potent and feature-rich, requiring the use of more sophisticated software and drivers. Therefore, at some point, for any reason, perhaps you are installing a new device or want to reinstall graphics drivers. It’s possible that the current one is incompatible or has stopped working. You may wish to use GPU Driver Uninstaller to uninstall the drivers for your old NVIDIA graphics card.
Old or unused drivers can lead to stability problems, latency in software (such as games), or hardware problems. So, if you are having trouble and can’t uninstall Nvidia drivers, this article will show you how to completely uninstall NVIDIA drivers on Windows 10. But first, let’s understand some of the reasons why we need to uninstall NVIDIA drivers.
Why Uninstall NVIDIA Driver?
When installing the Windows operating system via Windows Update, the Nvidia drivers often get installed automatically with it. The newly installed Windows will automatically install all the missing device drivers and replace them with the appropriate ones. Sometimes the NVIDIA graphic card begins to malfunction because the NVIDIA drivers were not installed correctly for a number of reasons.
To help you identify or connect your problem to those reasons, we’re providing all the potential reasons. After that, we’ll show you how to properly uninstall the Nvidia driver from your Windows 11 or 10 PC. Let’s examine the reasons for this:
- Instead of installing the correct driver, Windows Update installed the compatible driver.
- The Nvidia drivers immediately become corrupted.
- Currently installed drivers have an error that causes them to act improperly.
- Improper System Configuration: Your system does not meet the minimum system requirements for the drivers and applications you installed. As a result, your computer act sluggish, and the only solution is to remove these drivers and programs.
- Updating a New Driver: Perhaps the manufacturer has issued an updated version of the current drivers and software, and you are interested in upgrading to it. However, you want to perform a fresh installation, which requires that you remove the old drivers first.
- Reinstalling Drivers: Your current drivers aren’t operating correctly because you made a mistake during installation. Consequently, the best course of action is to uninstall these drivers first, then reinstall them using their official installation process.
No matter which of the aforementioned reasons applies to your situation, or perhaps you have another reason, the instructions provided below will assist you in uninstalling the NVIDIA drivers from your computer. However, there are a few things you need to take care of before you use the GPU driver uninstaller to uninstall the Nvidia driver on Windows 10.
Boot Your Computer into Windows Safe Mode
The software and drivers for your graphics card are in use if Windows is running in normal mode. They won’t get properly installed as a result of this condition.
Therefore, attempting to uninstall NVIDIA drivers from your computer while Windows OS is running in normal mode would prevent all driver files from being completely removed. Uninstalling the drivers with the GPU driver uninstaller while Windows is in safe mode will solve this issue.
Additionally, Safe Boot will safeguard you from system crashes and other issues while you continue with the upgrades. You can do that easily by following the instructions below:
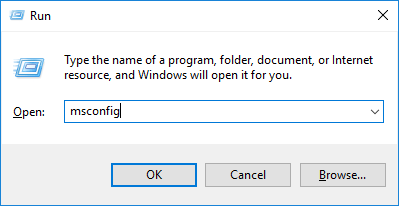
- To launch the Run window, press the Win+R keys on your keyboard.
- Type in MSConfig in the box and click on OK or press Enter.
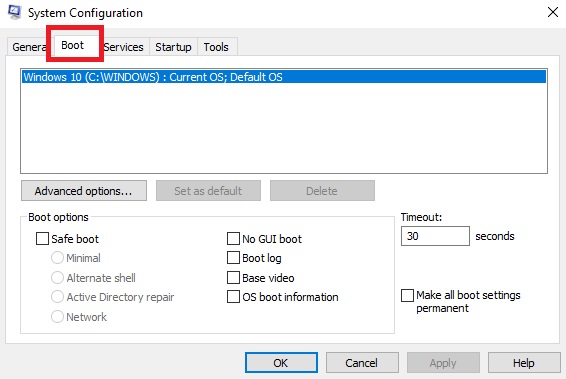
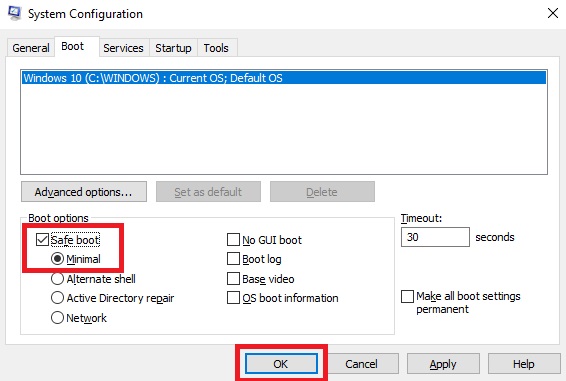
- Once the System Configuration Menu has loaded, click on the Boot tab.
- Choose the operating system you are currently using.
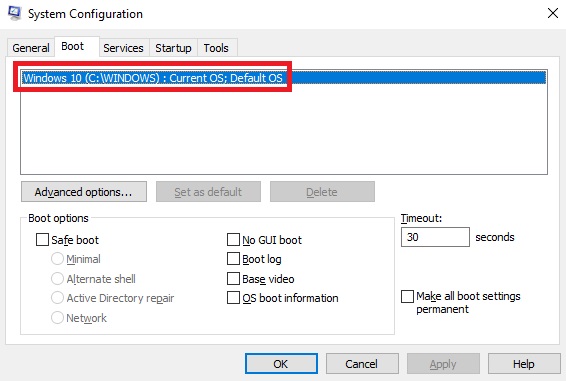
- Select the “Safe Boot” checkbox, then click the OK button.
- Repeat the process to unmark the box and uninstall the driver after the system restarts.
Continue with the steps for carrying out the NVIDIA driver cleaner once the preventative approach has been finished before the driver uninstall is complete.
Also know: How to Reinstall Graphics Drivers in Windows 10/11
How to Uninstall Nvidia Drivers on Windows 10
If you’re upgrading your Nvidia graphics card or are experiencing issues with it, it’s a smart move to uninstall the Nvidia drivers in Windows 11. Here are some techniques for uninstalling Nvidia drivers from Windows 10.
Method 1: Uninstall NVIDIA Driver with Device Manager
The Device Manager is one of the most effective and safest methods to uninstall NVIDIA drivers on Windows 10 computers. This is a built-in program for Windows computers that lets you manage, update, and remove the device driver. To assist you in doing the same, follow these simple steps:
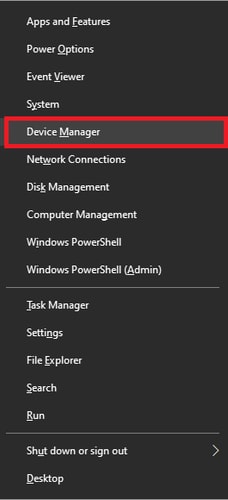
- Right-click the Windows button located on the taskbar and run the Device Manager.
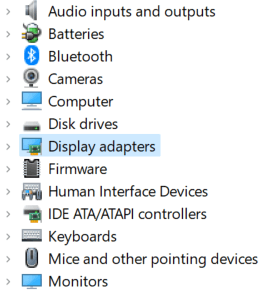
- When the manager comes up, expand Display Adapters.
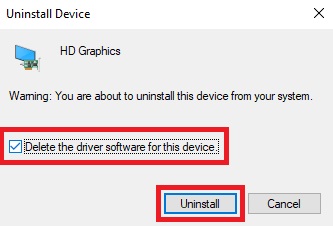
- Locate your NVIDIA graphics device and select “Uninstall device” from the context menu.
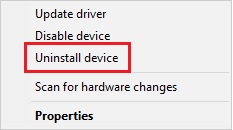
- If a warning window pops up, click the Uninstall button after selecting the box that says “Delete the driver software for this device.”
Follow the next method as well to complete the NVIDIA uninstaller process.
Method 2: Uninstall NVIDIA Driver Using the Control Panel.
Control Panel is another option that you can use to uninstall NVIDIA drivers on Windows 10/11 or eliminate extra software and files associated with them. To immediately uninstall Nvidia drivers on Windows 11/10, adhere to the detailed instructions provided below:
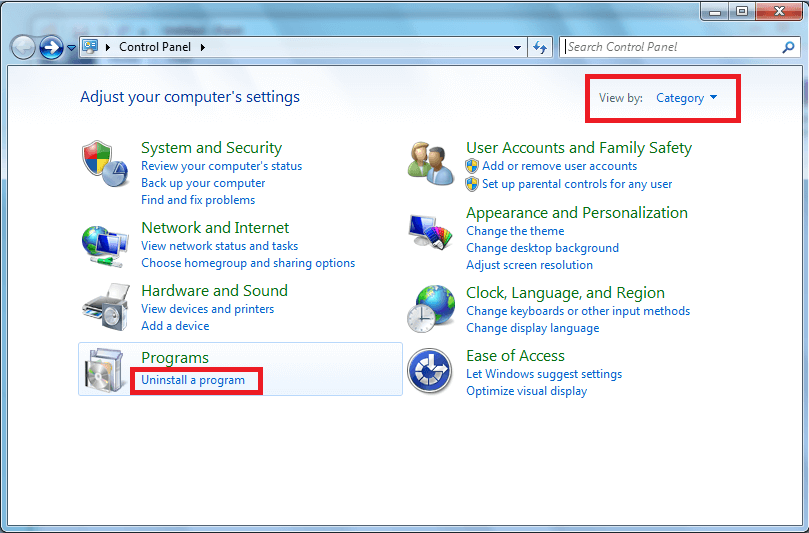
- Press Enter after typing “Control Panel” into the taskbar’s search box to find it.
- To continue, select Uninstall a program.
- Click the “Uninstall” button next to each NVIDIA program in the list of installed programs on your computer.
- Uninstall the driver by following the on-screen instructions.
- Restart your computer to apply the changes.
The utility makes it very simple to uninstall NVIDIA drivers on Windows 11/10. Before continuing with the GPU driver uninstaller process, though. See the expert advice below to learn more about what you can do to resolve issues related to the NVIDIA drivers.
Also know: How to Download and Update NVIDIA GeForce GTX 1050 TI Drivers on Windows
Recommended Advice: Update NVIDIA Drivers Using Bit Driver Updater
You can uninstall NVIDIA drivers on Windows 10 using either of the two techniques we described. The solution to a problem with the graphics processing unit is not always this. Try to update the drivers if you are experiencing any problems. Most often, outdated drivers are the primary cause of any driver’s misbehavior. You may experience issues if the system doesn’t have the correct drivers installed.
The best and safest course of action in these circumstances is to update the drivers rather than utilize the NVIDIA uninstaller. The Bit Driver Updater will assist you in completing this. You may update all different sorts of networks, graphics, and various other device drivers with this safe utility on your PC. The software also provides additional features.
You may save time and effort with enhanced capabilities like one-click installation of driver updates. You may also back up and restore the drivers using the software. Schedule the driver updates wherever and whenever you like using the tool’s built-in driver update scheduling function.
Bit Driver Updater’s interface is bilingual, which is to your benefit because users all around the world adore and use this utility. And that’s not all; when you set up and use the software on your Windows PC, you will also discover a number of additional capabilities. To use the tool safely for the time being, you ought to follow the steps below: Here’s how to use Bit Driver Updater to update the driver.
- To download the Bit Driver Updater installation file, click on the download link shared below.

- Install Bit Driver Updater by clicking the setup that was downloaded.
- Allow the program to run a thorough PC scan for a few seconds.
- Once you’ve reviewed the list of out-of-date drivers, click Update All to start the process of automatically downloading the most recent versions.
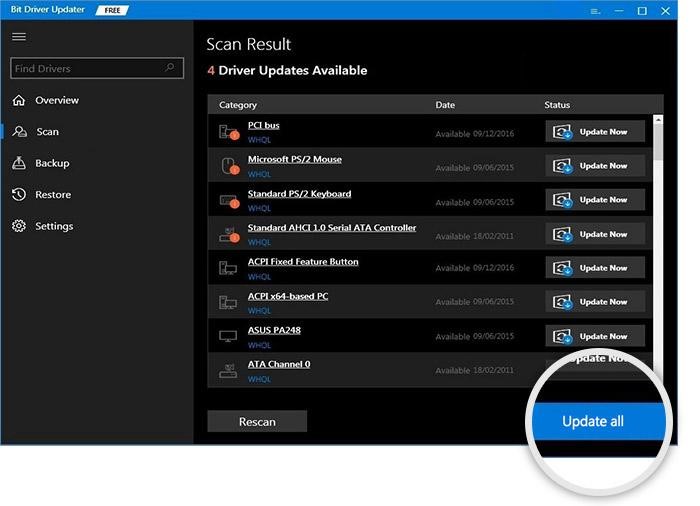
By selecting the Update Now button that is located next to a specific driver, you can update just that driver individually.
Successfully Uninstalled NVIDIA Drivers on Windows 10 and 11:
We hope the methods mentioned above enable you to successfully uninstall NVIDIA drivers on Windows 10 and 11 without experiencing any issues. Don’t forget to Safe Boot your computer before using one of the two procedures to remove the driver. By doing this, you can be sure that the uninstallation will go well.
However, if you can’t uninstall NVIDIA drivers, rather than taking the drastic step of uninstalling them, we advise that you try updating them. By doing this, you’ll be able to eliminate any errors that may arise while using the device. One of the best tools for doing that is the Bit Driver Updater. The comment box below is available to assist you if you have any queries or recommendations.
Snehil Masih is a professional technical writer. He is passionate about new & emerging technology and he keeps abreast with the latest technology trends. When not writing, Snehil is likely to be found listening to music, painting, traveling, or simply excavating into his favourite cuisines.


![How to Update and Reinstall Keyboard Drivers on Windows 10/11 [A Guide]](https://wpcontent.totheverge.com/totheverge/wp-content/uploads/2023/06/05062841/How-to-Update-and-Re-install-Keyyboard-Drivers-on-Windows-10.jpg)
