
HP printers are among the most popular and widely used printers around the world. However, sometimes you may face issues while trying to connect the HP printer to a WiFi network.
This can be a frustrating issue, especially when you need to print an important document. If you are facing the same issue, don’t worry as we have got you covered.
In this blog, we will be discussing the step-by-step method to fix the HP printer not connecting to WiFi network error for Windows PC.
Various Ways to Fix HP Printer Not Connecting To Wifi Error on Windows
If you are looking for some effective and easy ways for connecting HP printer To Wifi without any error, then without wasting a minute, move ahead and find the stepwise methods to do so.
Way 1: Check the Printer’s Connection
Before trying out any technical solution for the HP printer not connecting to WiFi error, it is always a good practice to check the basics. Start by making sure the printer is on and linked to the same network as the PC.
Also, check if the printer is within the range of the WiFi network. If everything seems fine, move on to the next step.
Way 2: Restart the Printer and Router for the HP Printer Wifi Setup
If the basics are all good, restart both the printer and the router. Sometimes, this simple solution can resolve the HP printer not connecting to WiFi issue. To restart the printer, turn it off and unplug it from the power source. Then, wait for a minute and plug it back in.
Restart the printer and wait for it to finish booting up. Similarly, restart the router by turning it off, and unplugging it from the power source. Then wait for a minute before plugging it back in.
If this doesn’t work, try more solutions below to solve the HP Printer won’t connect To Wifi problem.
Also know: Virgin Media WiFi Not Working! Here’s How to Fix?
Way 3: Check The WiFi Connection
The next step in fixing the HP printer not connecting to WiFi is to make sure your Windows PC is connected to the wifi network. If the PC is not connected to the wifi network, the printer will not be able to connect to the wifi network either.
To check the wifi connection on the Windows PC, follow these steps:
- Click on the Windows icon in the bottom left corner of the screen.
- Then, click on the gear icon to open the Settings menu. In the Settings menu, click on the “Network & Internet” option.
- Now, in the Network & Internet menu, click on the “Status” option. In the Status menu, check the “Wi-Fi” section to see if you are connected to the wifi network.
If you are not connected to the wifi network, you can click on the “Connect” button to connect to the wifi network. Now, check if the HP printer is connecting to WiFi. If not, then read on to find more solutions.
Way 4: Check the Printer’s WiFi Settings
The next solution for the HP printer not detecting WiFi problem is to make sure the printer is configured to connect to the wifi network. If you are wondering How to set up Wi-Fi on HP printer, then follow these steps:
- Press the “Menu” button on the printer. Use the arrow buttons on the printer to navigate to the “Network” option.
- Now, press the “OK” button to select the “Network” option. Use the arrow buttons to navigate to the “Wireless” option.
- Then, press the “OK” button to select the “Wireless” option.
To determine whether the printer is linked to the Wifi network, check the “Wireless” option. If the printer isn’t already, you’ll need to connect it to the Wifi network.
After connecting if you are still facing the HP printer not connecting to Wifi error, then read ahead to find some more fixes.
Way 5: Update the Printer Driver for Connecting the HP printer to Wifi
If none of the above solutions worked for you, then it could be that the HP printer driver is outdated. Keeping your printer driver updated can fix many issues including, “Hp Printer Not Connecting To Wifi” and “HP Printer Not Printing” on your system.
There are two methods for updating your system drivers: manual and automatic. Let us first understand the manual method below. To update the printer driver, follow these steps:
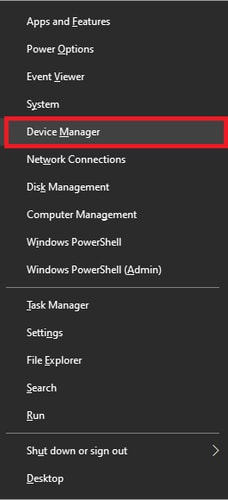
- Press Windows key + X and select Device Manager from the options.
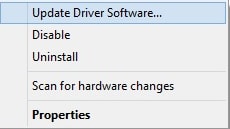
- Find the HP printer from the list and right-click on it.
- Select “Update driver” from the context menu.
- Choose “Search automatically for updated driver software”.
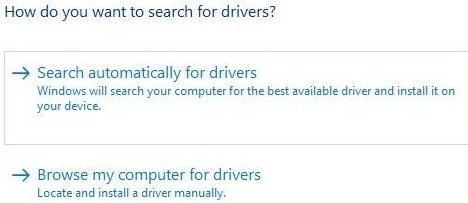
Wait until Windows searches for an updated driver. If found, follow the on-screen instructions to install the updated driver. Once the installation is complete, restart your computer.
Now, let us move forward with the automatic method of updating your drivers.
The automatic method of fixing the HP printer won’t connect to Wifi error
This is the fastest and simplest fix for the HP printer that won’t connect to Wifi problem. To fix this problem, you can download and install the Bit Driver Updater software. It is considered the most reliable and trustworthy software available.
This software was created specifically for Windows OS devices. With the help of this program, you may update all of your drivers at once and resolve issues like the HP printer cannot connect to Wifi.
Also, this software helps you in improving and speed up your PC performance. You must use Bit Driver Updater to resolve the “HP printer will not connect to Wifi” issue for the following significant reasons:
- Increases drivers’ download speed.
- Improves the compatibility of your PC with external devices.
- Helps in scheduling the update procedure.
- Installs WHQL-certified device drivers.
- Creates backup for old drivers.
Follow the below steps in order to fix the HP printer not connecting to Wifi error.
- You may download the Bit Driver Updater tool using the link given below.

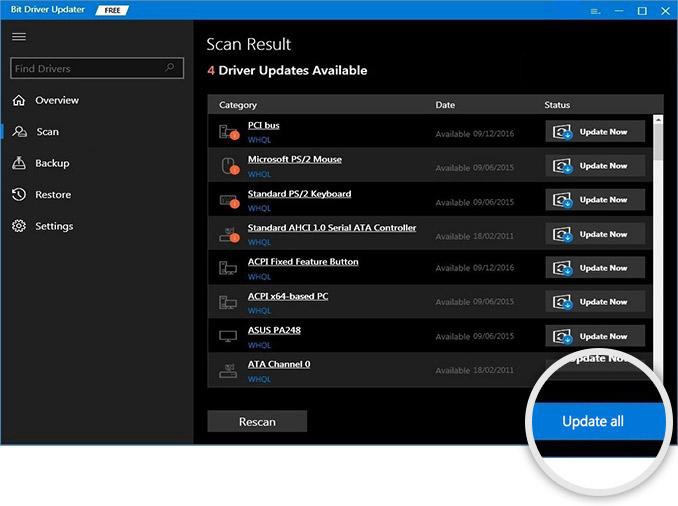
- After completing the installation process, start the application and instruct the software to begin the scanning process of drivers through the Scan Drivers option.
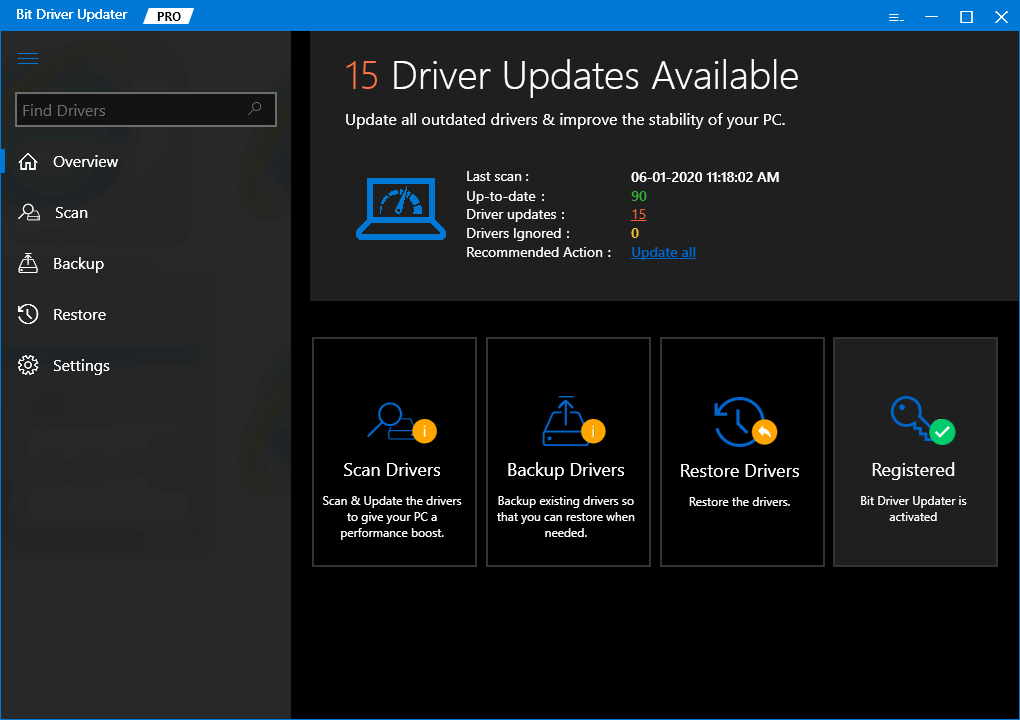
- Following that, you will see a list of drivers on your computer that requires an update.
- Now, click either on the Update Now button next to the HP printer driver or click on the Update All button.
The last step is to reboot your computer. After restarting, your system will start using the latest and most compatible drivers.
Way 6: Disable Windows Firewall
Windows Firewall can also cause issues while connecting HP printer to WiFi networks. To disable the Windows Firewall, follow these steps:
- Press Windows key + X and select Control Panel from the options. Click on Windows Defender Firewall.
- Click on the “Turn Windows Defender Firewall on or off” option.
- Select “Turn off Windows Defender Firewall (not recommended)”. Click OK to confirm.
Now, check if the HP printer is connecting to WiFi.
Way 7: Reset the Printer for HP Printer Won’t Connect To Wifi Error
If none of the above steps work, resetting the printer could be the solution to the HP printer not connecting to Wifi issue. To reset the printer, follow these steps:
- Turn off the printer. Unplug the power cable from the printer and the system outlet.
- Wait for 30 seconds. Plug the power cable back into the system outlet.
- Then, turn on the printer.
Fixed: HP Printer Not Connecting to Wifi Network Problem for Windows System
That’s all! We hope this article was useful to you and helped you in fixing the HP printer not connecting to Wifi network error on the Windows system. Please feel free to ask any questions in the comments section below. Moreover, subscribe to our newsletter below to continue getting more such how-to-fix guides.
Snehil Masih is a professional technical writer. He is passionate about new & emerging technology and he keeps abreast with the latest technology trends. When not writing, Snehil is likely to be found listening to music, painting, traveling, or simply excavating into his favourite cuisines.


![How to Update and Reinstall Keyboard Drivers on Windows 10/11 [A Guide]](https://wpcontent.totheverge.com/totheverge/wp-content/uploads/2023/06/05062841/How-to-Update-and-Re-install-Keyyboard-Drivers-on-Windows-10.jpg)

vivaro.am
Apr 27, 2023 at 2:06 amInformation is very useful