
Is your Skype microphone not working on Windows 10 device? If yes, then you can implement the different solutions shared in this article to get rid of it within minutes.
Skype is one of the best applications for Windows devices for video calls. Millions of people use Skype on their computers to attend meetings or video calls with their friends and family. However, like every other PC software, Skype can sometimes have problems. Some common issues include Skype audio not working, incoming calls becoming unreachable, communication delays on calls, or your calls dropping randomly.
In such cases, you won’t be able to hear anything on Skype. Most of the time, these problems originate from your computer’s operating system. However, sometimes the app or audio components are also to blame. If you are one of the users who is facing the Skype mic not working issues on their Windows PC, this article will show you various methods to fix this problem. But before jumping on to that let’s take a look at the common reasons behind this issue.
Reasons Causing The Skype Audio Not Working Windows 10
Below we have shortlisted some common reasons why users are facing the Skype mic not working problem on their computers.
- Background apps restricting mic access
- Outdated or corrupted audio drivers
- Wrong microphone settings
- Issues in Windows audio services
Now, as you have looked at the different reasons that may cause your Skype microphone not working, it’s time to try out the different solutions for it.
Different Ways To Fix Skype Microphone Not Working On Windows 10
Here is a list of solutions that you need to follow in order to get rid of the Skype audio not working problem.
Solution1: Allow Skype To Access The Microphone
The first thing you should do is check to see if Skype is allowed to use your microphone. There are a number of settings in Windows that let you change which apps can use which hardware devices. Skype might not be able to use your microphone because it does not have permission or access to use it. Check out the steps shared below to change mic access and fix the Skype microphone not working issue.
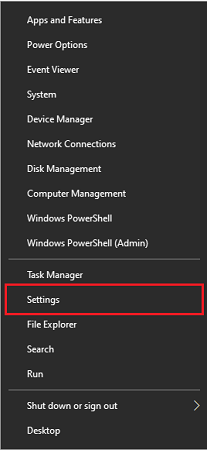
Step1: Hit the Windows button and X button on your keyboard at the same time. Then, choose the Settings option from the Start menu’s context list.
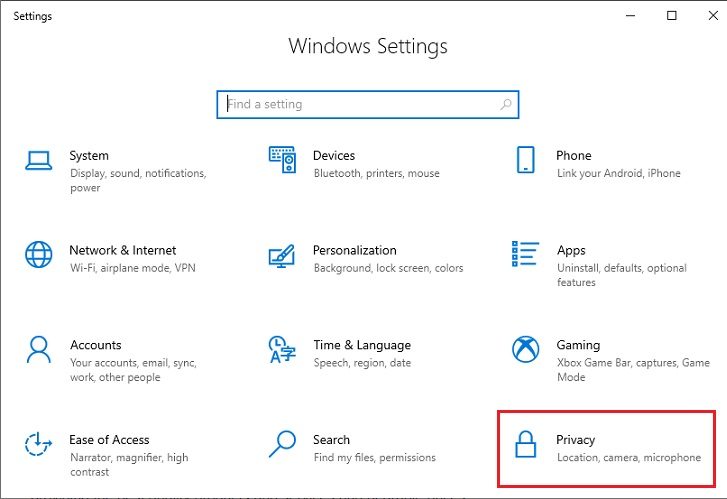
Step2: On the Settings window, choose the Privacy settings section
Step3: Now, go with the Microphone tab by selecting it from the left pane.
Step4: Then, on the right side enable the “Allow apps to access microphone” toggle switch.
Step5: After that, scroll down, and under the “Choose which Microsoft Store apps can access your microphone” section, make sure that the toggle switch in front of Skype is turned ON.
Once you are done with the process, close the window and check if the Skype microphone not working problem is resolved or not. If not, move to the next solution.
Solution2: Restart Windows Audio
Some minor issues in your Windows Audio Service can also be the reason for the Skype mic not working issue and restarting it is the best possible fix. Follow the steps below to restart your Windows Audio Service.
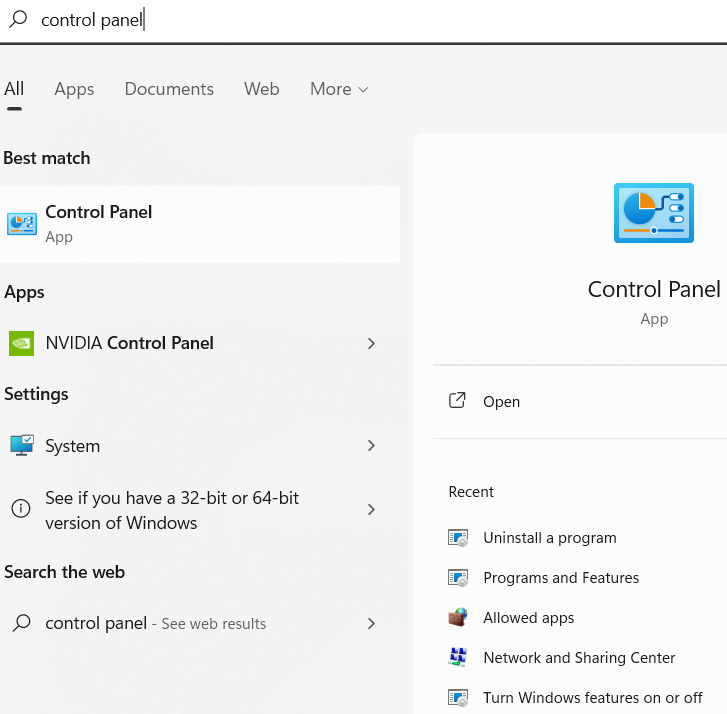
Step1: Search Control Panel in the taskbar’s search bar and then press the Enter key with your keyboard.
Step2: Go with the Category option in the View by dropdown.
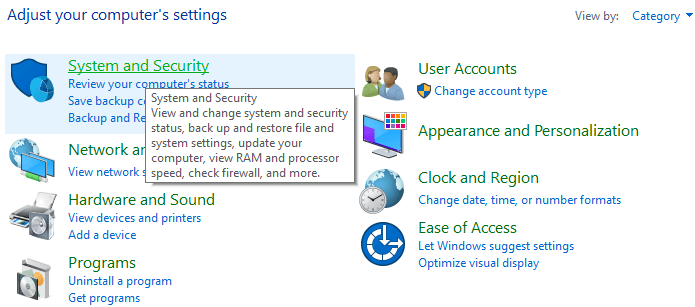
Step3: Now, click on the System and Security option with your mouse.
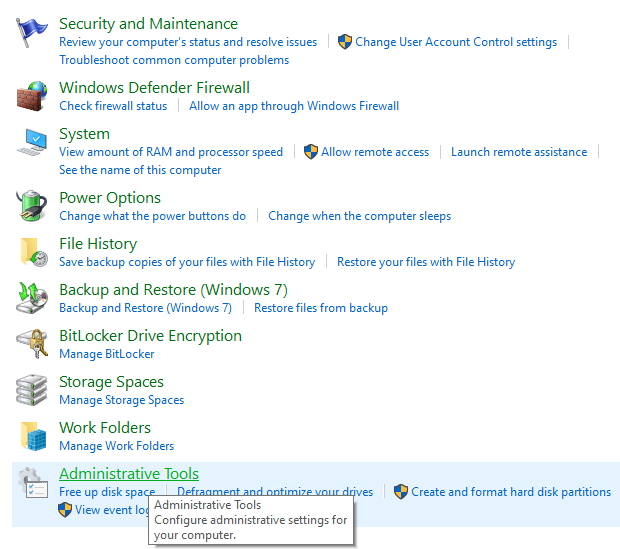
Step4: Then, choose the Administrative Tools option. This will open a new window showing all the in-built tools on your computer.
Step5: Double-click on the Services tool to open it.
Step6: On the Services window, scroll down and search for the Windows Audio option.
Step7: Once you find it, right-click on it and go with the Restart option in the context menu.
Wait for a few minutes so that your computer can restart the audio services. Then, see if the Skype microphone not working problem is gone or not. If not, then you need to update your Windows OS.
Solution3: Get The Latest Windows Operating System
Keeping Windows up-to-date will help your computer run smoothly and more efficiently, as well as be more compatible with the devices you connect to it. Moreover, updating your Windows will also help your computer fight issues like Skype microphone not working on Windows 10. Follow the steps below to get the most recent version of the Windows operating system on your computer.
Step1: Press the Windows key + X key simultaneously on your keyboard and it will open the Start menu’s context list. Click on the Settings option on that list.
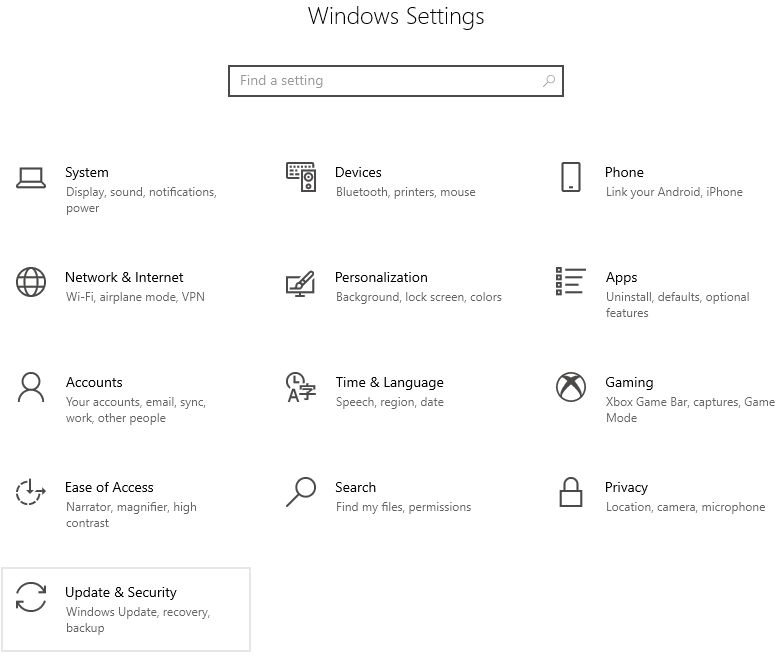
Step2: On the Settings window, choose the Update & Security settings option.
Step3: Now, select the Windows Update tab from the left pane.
Step4: Then, click on the Check for updates button present on the right-side panel.
Step5: Wait for a few minutes and let your computer search for any updates available online. If there is any, a Download and install will be displayed on your screen.
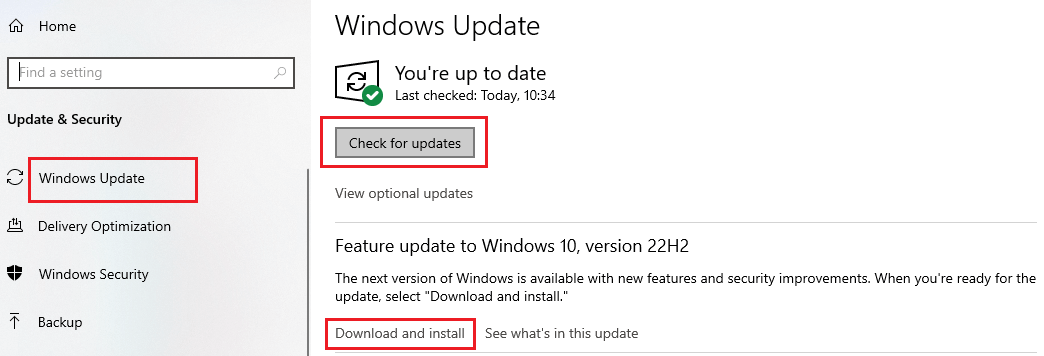
Step6: Click on that button to get the latest Windows OS installed successfully on your computer.
Once the process is complete, restart the system and your computer will start using the new Windows OS. Check to see if performing this task has helped you with fixing the Skype microphone not working issue. If the problem is still there, you need to update the audio drivers.
Also know: USB PnP Sound Device Drivers Download, Install and Update
Solution4: Update Windows Audio Drivers
Having outdated or corrupted drivers is one of the most common reasons why people face issues with their connected devices. And in this case, if your audio drivers are out of date, you might face the Skype audio not working issue. Most of the drivers can be updated along with your Windows OS.
However, there are times when you need to update them on your own. The best way to perform the driver-download process is to use the Bit Driver Updater app. This app is a third-party driver updating software, which keeps all your drivers up to date automatically. You can also use this program to avoid issues like the Skype microphone not working. Here are some other benefits of using the Bit Driver Updater application on your Windows device.
- Time saver
- Supercharged performance
- Complete computer scan
- 24*7 customer support
- Single-click driver update
Steps to solve Skype microphone not working problem using Bit Driver Updater
Download the latest Bit Driver Updater app for your Windows device from the link given below. And then, follow the instructions to use the app in order to fix the Skype audio not working issue.
Step1: Get the most recent version of the Bit Driver Updater app by clicking on the link given below:
 Step2: Run the downloaded package file and then follow the setup wizard steps to successfully install the app on your computer.
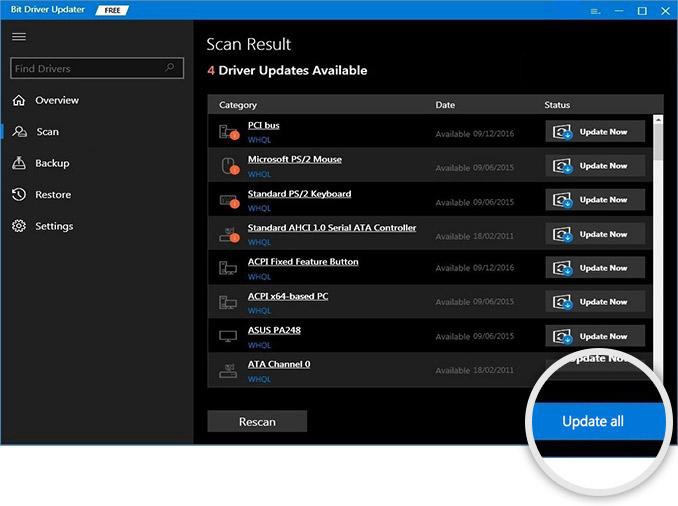
Step3: Launch the application and it will automatically start the scanning process to find the out-of-date drivers.
Step4: Choose the Update All option to update each and every driver that needs an update.
 After that, restart the computer and it will automatically replace the old drivers with the new ones. Once the process is complete, look for the Skype microphone not working issue. If it still persists, it’s time to run the Windows troubleshooter tool.
Solution5: Use Windows Troubleshooter
Windows OS comes with various kinds of tools to manage your computer. The Troubleshooter is one of these utilities that allow users to find and fix problems like the Skype mic not working. Below are some steps that will help you with the troubleshooting process in order to resolve the issue.
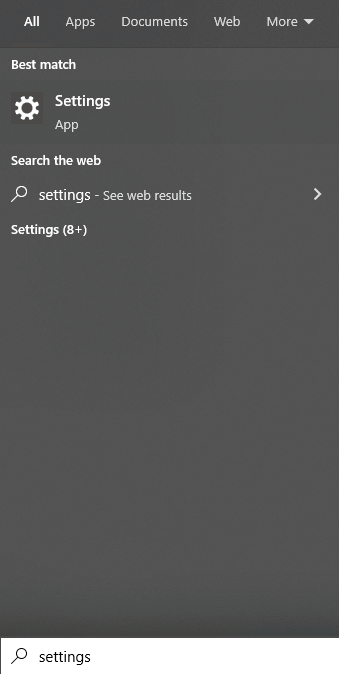
Step1: Type Settings in the taskbar’s search box and then hit the Enter key.
Step2: Navigate to the Update & Security section.
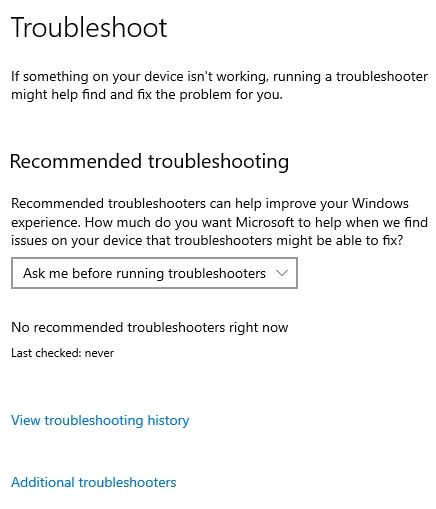
Step3: Select the Troubleshoot tab from the left side. And then on the right-hand side, click on the Additional troubleshooter button under the “Recommended troubleshooting” heading.
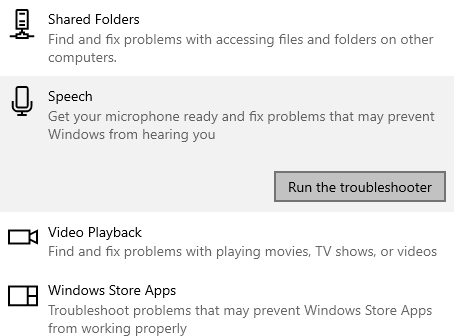
Step4: Under the “Find and fix other problems” section, expand the Speech option by pressing on it with your mouse.
Step5: Now, choose the Run the troubleshooter option and your computer will start looking for the reason causing the Skype microphone not working.
Step6: After that, some steps will be displayed on your screen, which you need to follow in order to get rid of the problem. Once the troubleshooting is complete, restart the system and the Skype mic not working issue will be gone.
Fixed: How To Solve Skype Microphone Not Working On Windows
These were some of the most efficient ways with which you can easily get rid of the microphone not working problem on Skype. In case the issue is still troubling you, contact Windows Support or Skype Support team for some professional help. Moreover, if you are facing difficulties in following any of the methods mentioned above, drop a comment in the box below and let us know about it.
Snehil Masih is a professional technical writer. He is passionate about new & emerging technology and he keeps abreast with the latest technology trends. When not writing, Snehil is likely to be found listening to music, painting, traveling, or simply excavating into his favourite cuisines.


![How to Update and Reinstall Keyboard Drivers on Windows 10/11 [A Guide]](https://wpcontent.totheverge.com/totheverge/wp-content/uploads/2023/06/05062841/How-to-Update-and-Re-install-Keyyboard-Drivers-on-Windows-10.jpg)
